Modified: October 19, 2021
1. Connecting Power Cord & other components
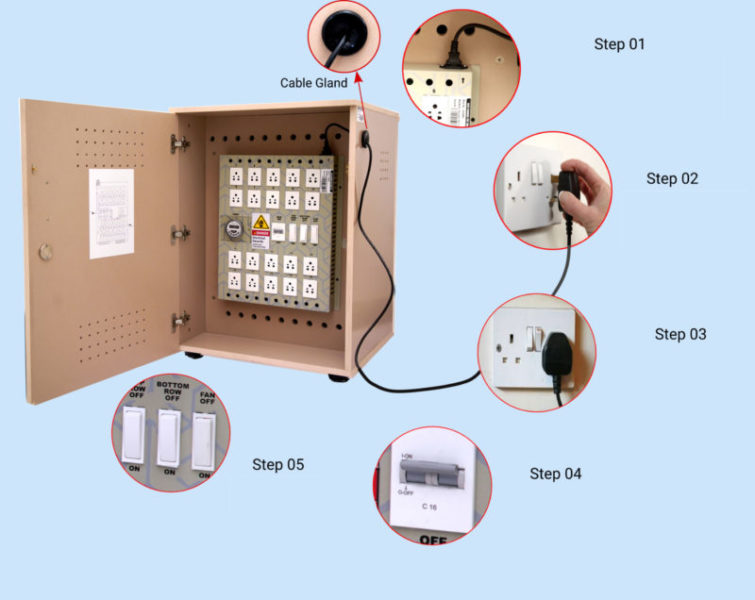
Power Cord is provided with the Rack Charger to be installed by running the Power Cord through Cable Gland and inserting into the IEC socket provided in the Rack Charger while the Power Cord plug is connected to the power socket with the main power source available in the classroom.

Step 01: Insert the Power Cord provided with the Rack Charger (run only through Cable Gland) in to the IEC socket
Step 02: Insert the power plug into the main power source socket
Step 03: Switch on main power source
Step 04: Turn on MCB switch Step 05: Turn on the switch for Fans and Top and Bottom Row power controls

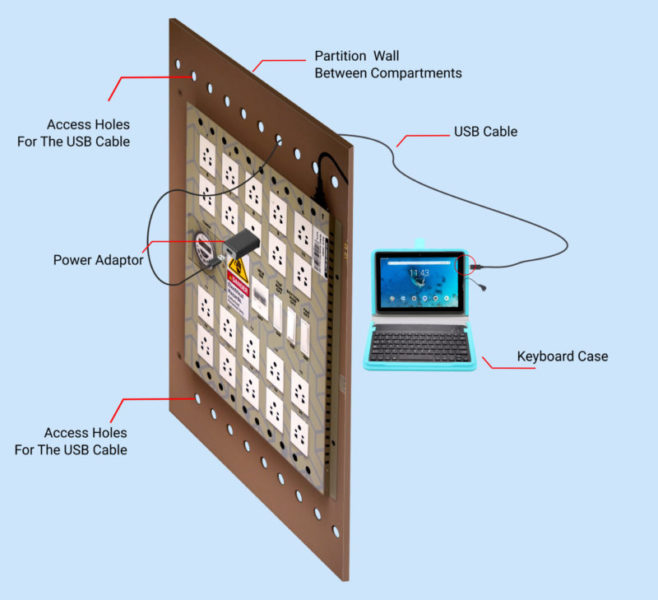
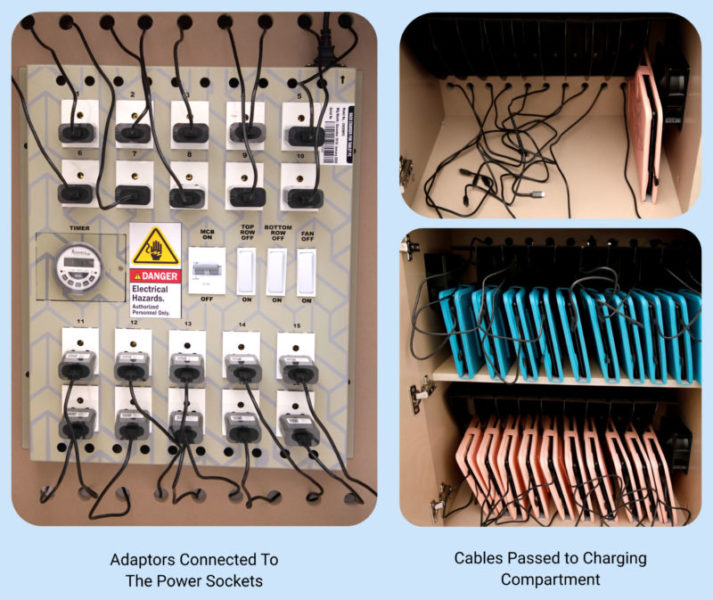
Power Adaptors provided along with the Tablets are to be connected to the power sockets in the Rack Charger as showcased above. Once the adaptor is inserted, USB cable provided shall be connected to the adaptor using USB connector pin and the cable to be passed to the Charging Compartment through access holes provided in the Rack Charger.

Once the Power Adaptors, USB cables are connected
Keep the MCB switch in ON mode
Keep the Fan switch in ON mode Keep the Top Row and Bottom Row switches in ON mode
 |
ALERT: The Power Cord shall be verified for visible damages. The USB connector cables shall only be connected the way showcased in this process through access holes provided on the partition wall between both Compartments. The power sockets in the Rack Charger should never be used for charging any other devices. |
2. Timer Configuration

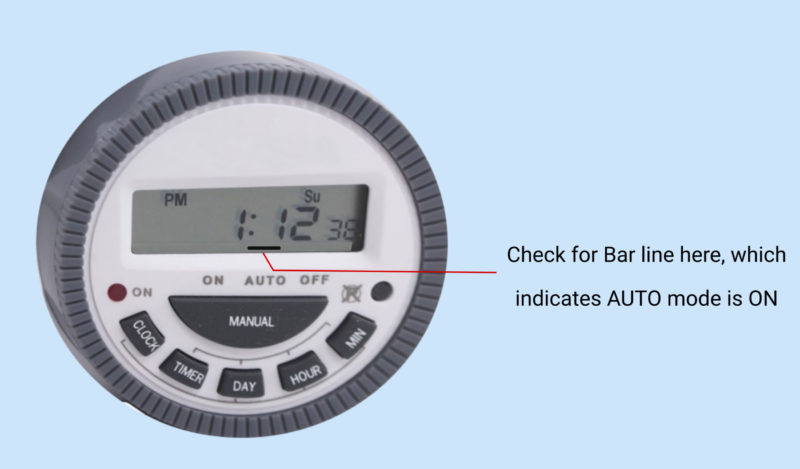
- Check Timer whether AUTO mode is in ON mode
- The Timer shall always be kept in AUTO mode
- Timer is preconfigured and calibrated for the preset timings
- All the Timers in Rack Chargers are configured with the timings instructed by the Ministry for the charging of Tablets, which is currently 7:30 AM TO 9:00 AM & 3:30 PM TO 5:00 PM (Monday to Friday)

