Modified: October 19, 2021
Timer based controller is the integral part of the Rack Charger, the controller’s purpose is to automate the charging timings of the Tablets.

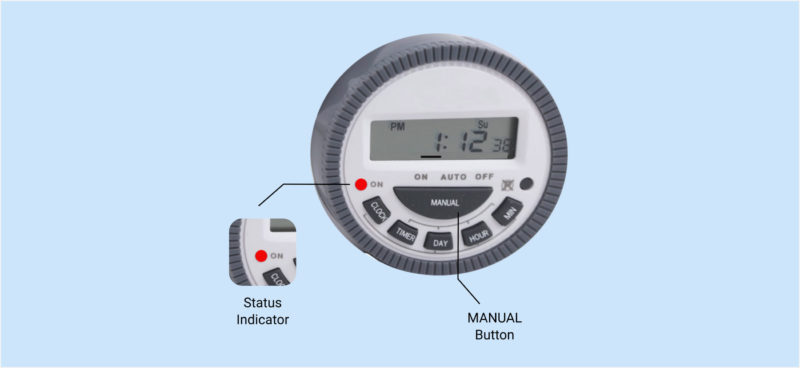
The functional buttons on the Timer
- MANUAL: To Select “ON, AUTO or OFF”
- LED: To indicate the ON/ OFF status (indicator will glow if the Timer is in MANUAL mode or the Timer is activated in AUTO mode during preset timing)
 |
ALERT: Functions available with Timer other than mentioned above are to be operated only by the technical support team. No one else should handle these buttons as the entire functionality of the Rack Charger depends on the calibration and configuration of the Timer. |
 |
NOTE: The Timer controls and provides power to the charging cabinet at the preset time intervals, however in case of any contingency or challenge the authorized personnel will operate the Timer in Manual mode and roll back to AUTO mode once the required charging process is complete. |
1. Timer Settings -from AUTO to MANUAL
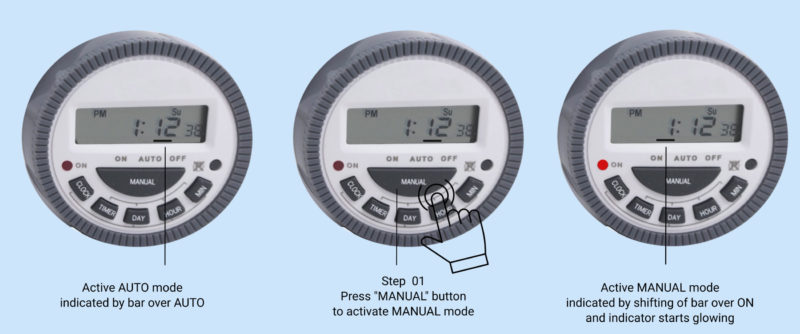
The Rack Charger functioning is controlled by TIMER at pre-configured timelines instructed by the ministry. The AUTO mode is indicated by the Bar over AUTO. However, in the time of contingencies and in case of any other challenges the Timer settings can be changed to MANUAL from AUTO and roll back to AUTO once the process is over.

Step 01: Press MANUAL button to move the status indicator bar over ON, and the indicator starts glowing.
2. Timer Settings -from MANUAL to AUTO
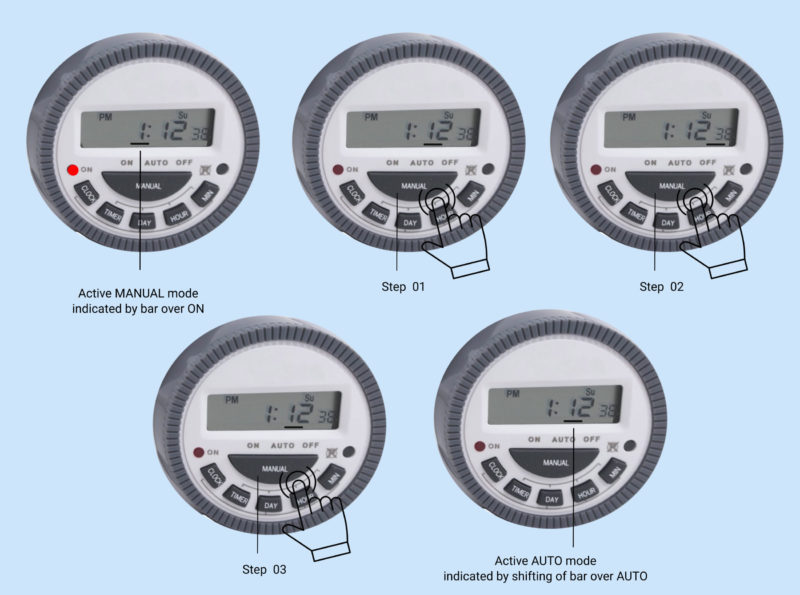
If the timer is set to MANUAL mode as a contingency measure, once the challenge is resolved the timer mode shall be changed to AUTO.

Step 01: Press MANUAL button, bar moves over Auto
Step 02: Press MANUAL button, bar moves over OFF mode
Step 03: Press MANUAL button, bar moves over AUTO mode

