


Modified: October 19, 2021
E-assessment is classified into two types:
- Subjective
- Objective
E-Assessments can be created and assigned to a set of students. It contains the following tasks:
1. Create E-Assessment
Once you click on “Create E-Assessment”, you will be given a choice to choose one from either of the categories i.e., Subjective and Objective. This represents the type of E-Assessment to be created. By default, Objective type is selected and shows the respective creation screen.
1.1 Subjective
In this module, you can create a descriptive question by filling all the mandatory fields (represented with an asterisk) like name, subject, marks allotted for this assessment, description and add attachments etc. After an E-Assessment is made, you will be prompted to initiate one of the following actions:
- Create: Assessment is created and saved in Subjective “un pushed” E-Assessments. Once this action is deployed, the screen will reset itself to the default “create E-Assessment” page.
- Create & Push: E-Assessment is created, and you can “push” that assessment to selected students or all students at a scheduled date and time.
- Print: This action allows you to take a printout of that E-assessment.
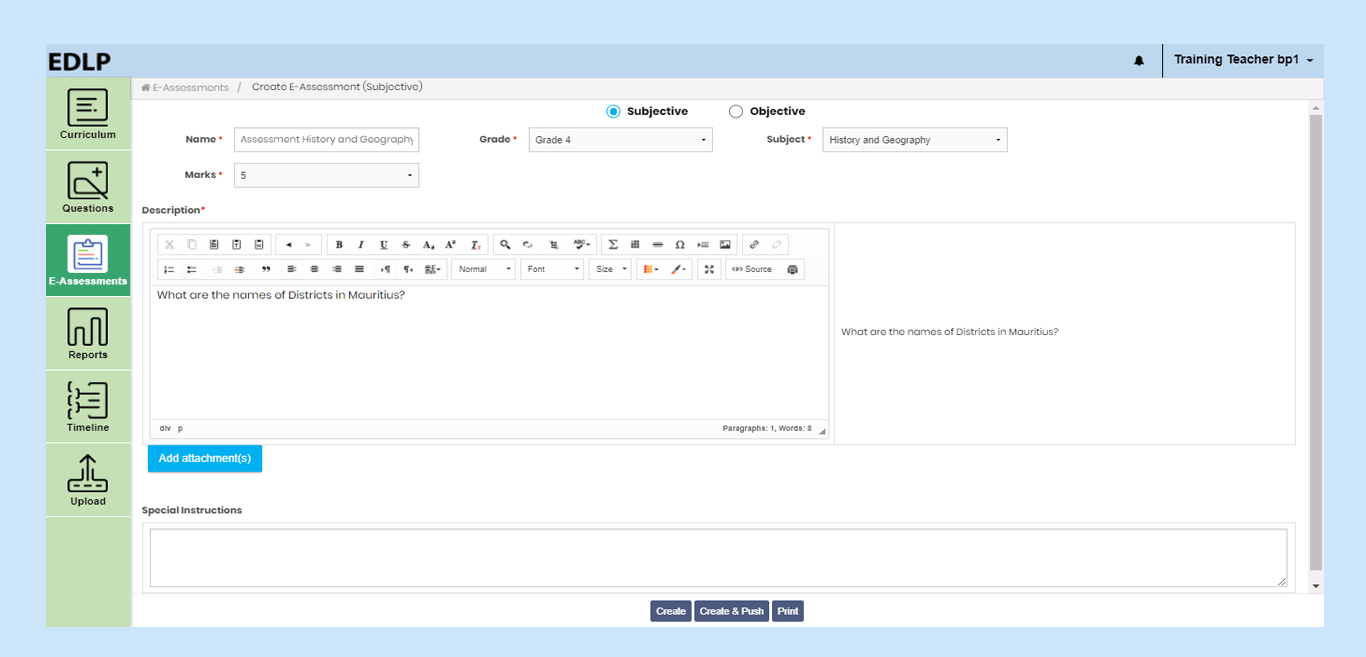 Pic 01: Create Subjective E-assessment page
You can add attachments while creating an e-assessment by clicking on Add attachments button. After attaching the file if you want to delete the attached file click on delete button
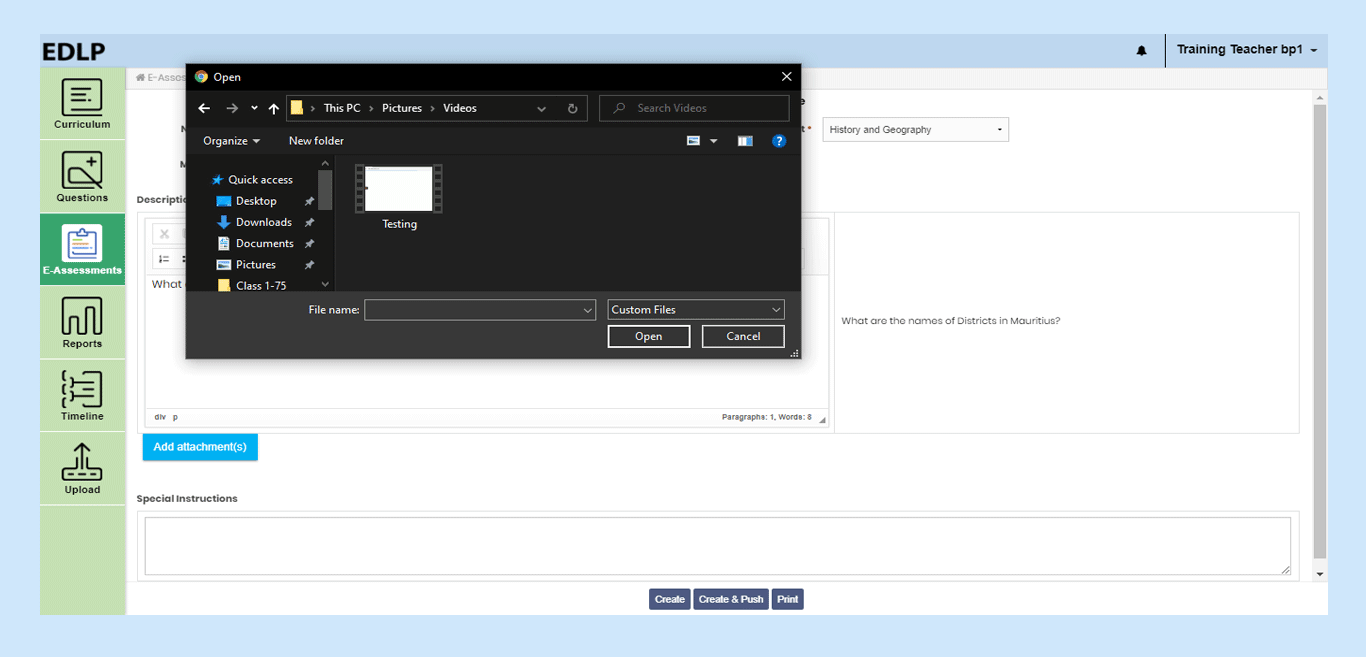 Pic 02: Subjective E-Assessment while attaching a file
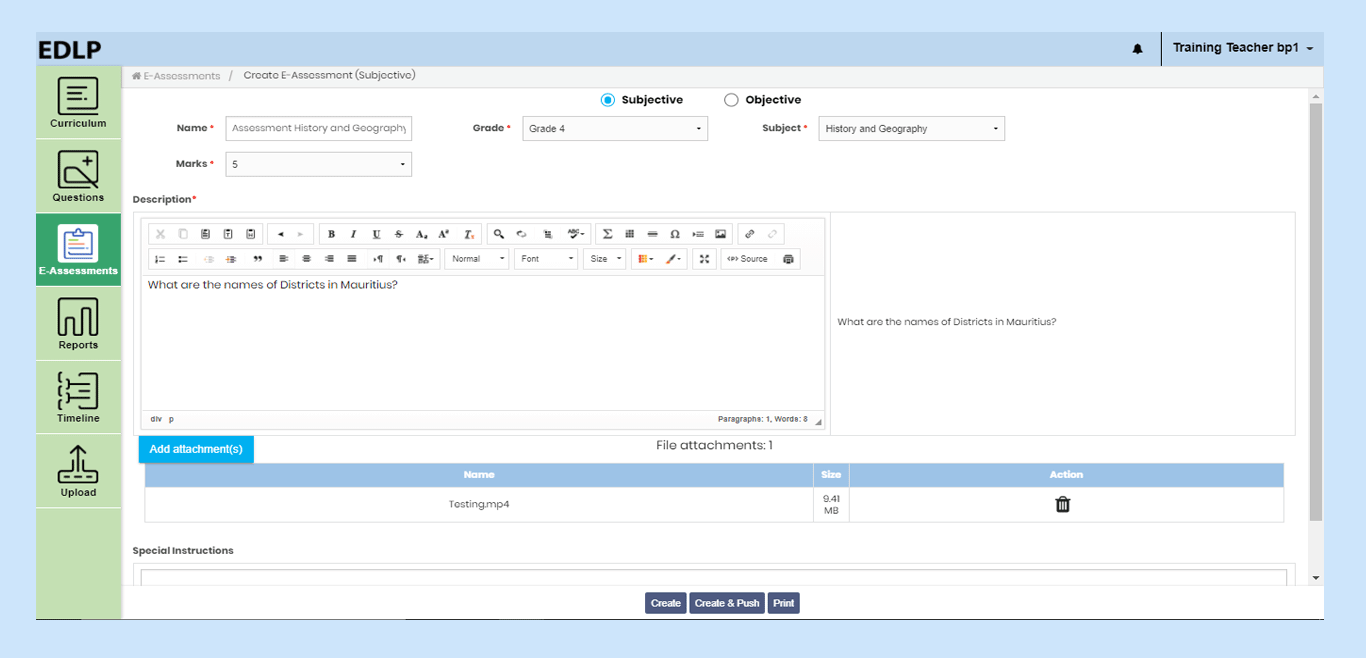 Pic 03: Subjective E-Assessment after attaching a file

If you click on the Create button, then the assessment will be created and saved in Subjective un pushed E-assessments and the whole screen will be reset with blank fields for creating another E-assessment.
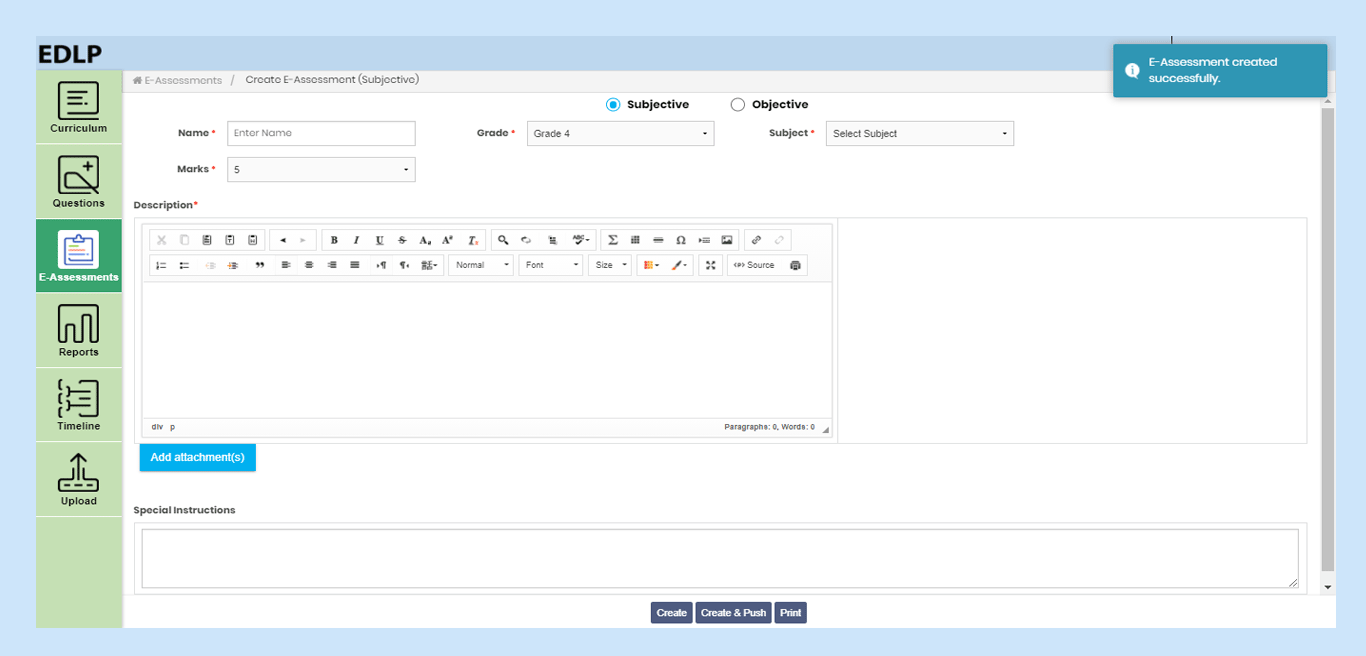 Pic 04: Creating a subjective E-Assessment
If you click on the “Create & Push” action, a new pop-up window will appear and you will be prompted to assign the created E-Assessment to respective students, either individually or section-wise. You can set the Date and Time for the E-Assessment to appear for the students(s).
 pic 05: Create & Push a subjective E-Assessment
1.2 Objective
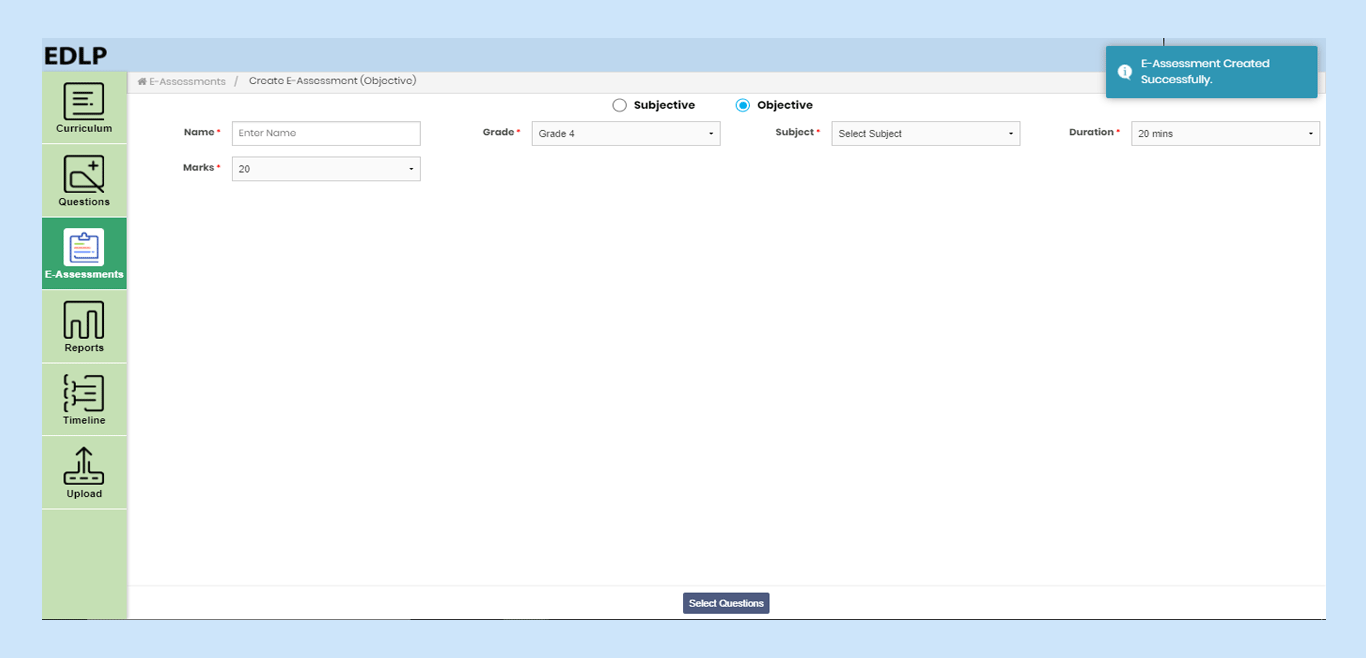
In this module, you can add a multiple-choice question by filling all the mandatory fields (represented with an asterisk) like name, subject and marks allotted for this assessment, etc. After filling in the fields, click on the “Select Questions” button. A window will pop up showing you a list of the created questions.
 Pic 06: Create objective E-assessment page
 Pic 07: Select Questions page
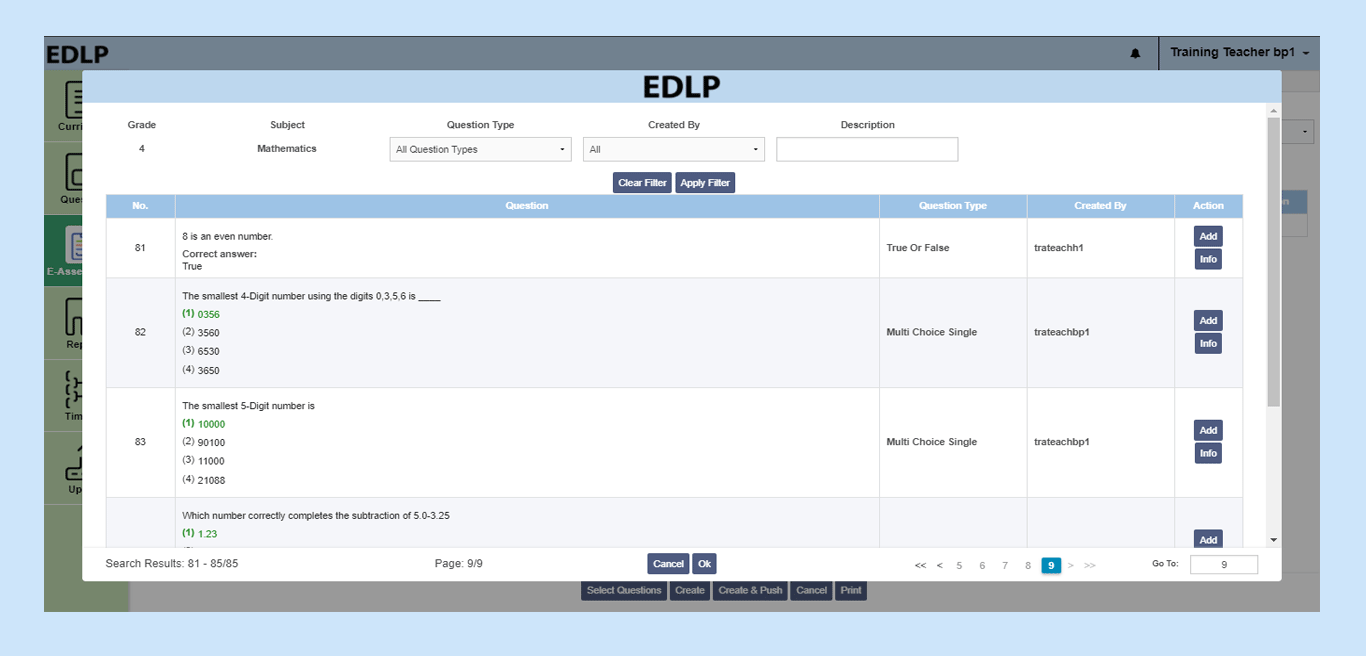
You can use the desired filters to display the required questions. Against each question “Add” and “Info” buttons are listed.
 Pic 08: Selecting Questions from list of questions
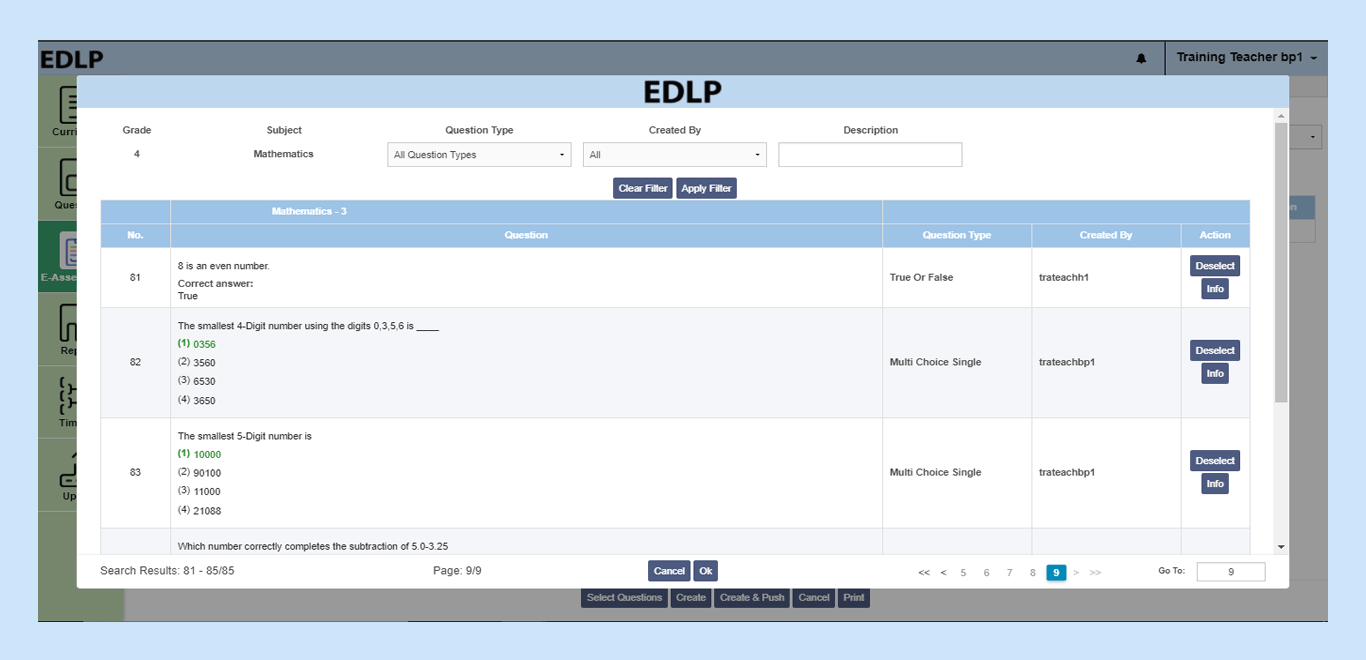
Questions can be added by clicking on the “Add” button. Multiple questions can be selected and added to the E-Assessment. Click on “Ok” to exit the questions selection screen. This new screen will show all the selected questions and a “Delete” icon against each question, should you desire to remove that question from the E-Assessment.
 Pic 09: Selected Questions list
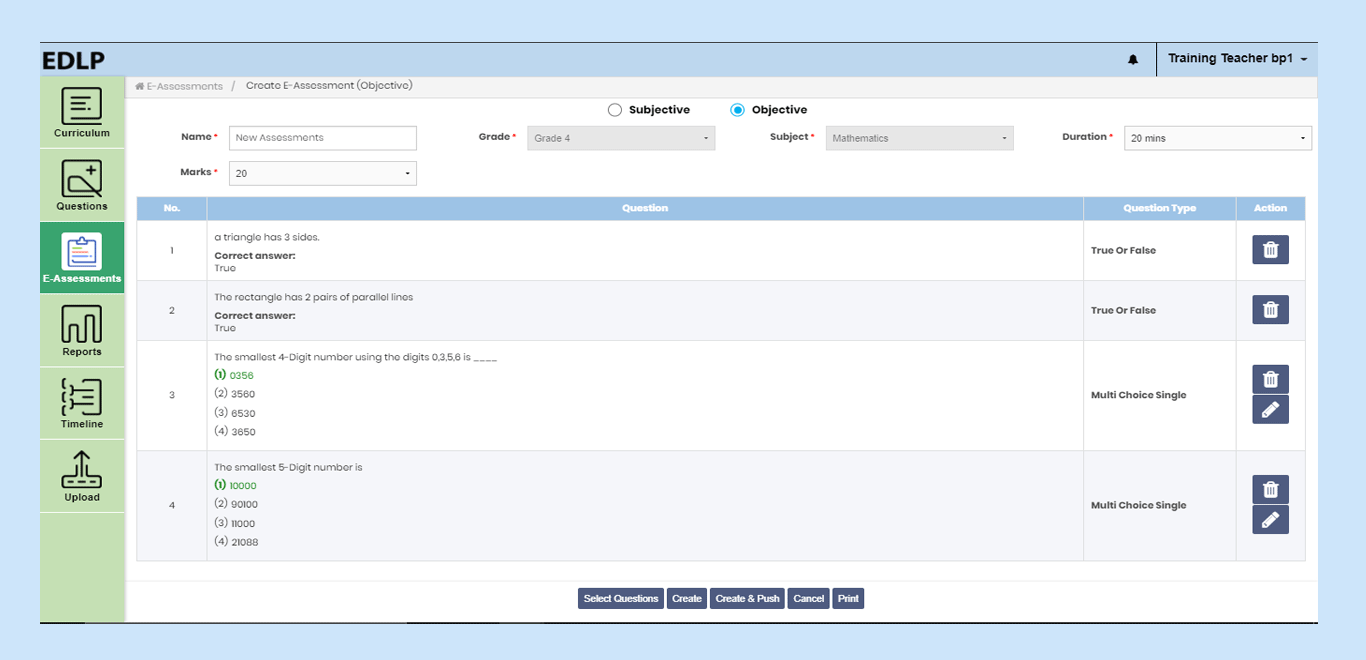
If you select any question created by you and add it to the E-Assessment, an edit icon will also be displayed against that question along with the delete icon. Once all the required questions,

- Edit: If you click on the edit button against the question, you will be navigated to the “Create Question” screen displaying the current Question. Make the required changes to the question and click on save to save the edited Question.
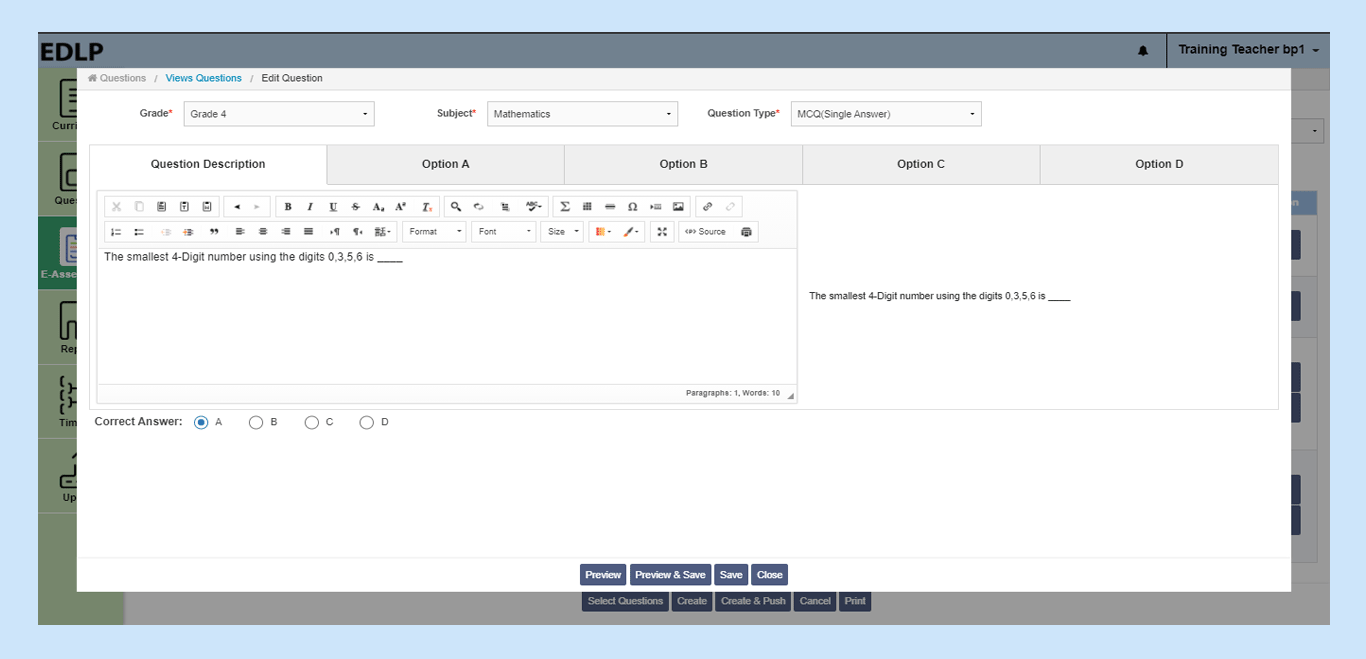 Pic 10: Edit a question from Create Objective E-assessment (Created by you)
After an E-Assessment is made, you will be prompted to initiate one of the following actions:
- Create: Assessment is created and saved in Objective “unpushed” E-Assessments. Once this action is deployed, the screen will reset itself to the default “create E-Assessment” page.
- Create & Push: E-Assessment is created, and you can “push” that assessment to selected students or all students at a scheduled date and time.
- Print: This action allows you to take a printout of that E-assessment.
 Pic 11: Creating an objective E-Assessment
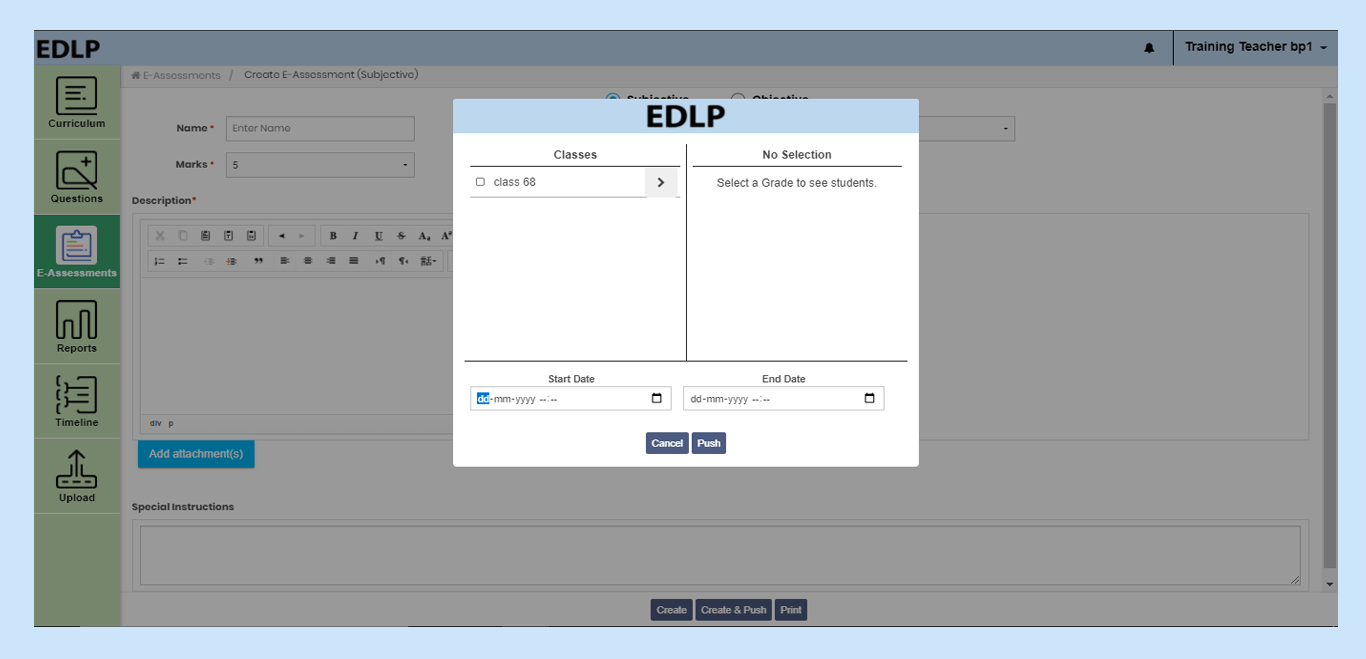
If you click on the “Create & Push” action, a new pop-up window will appear and you will be prompted to assign the created E-Assessment to respective students, either individually or section-wise. You can set the Date and Time for the E-Assessment to appear for the students(s).
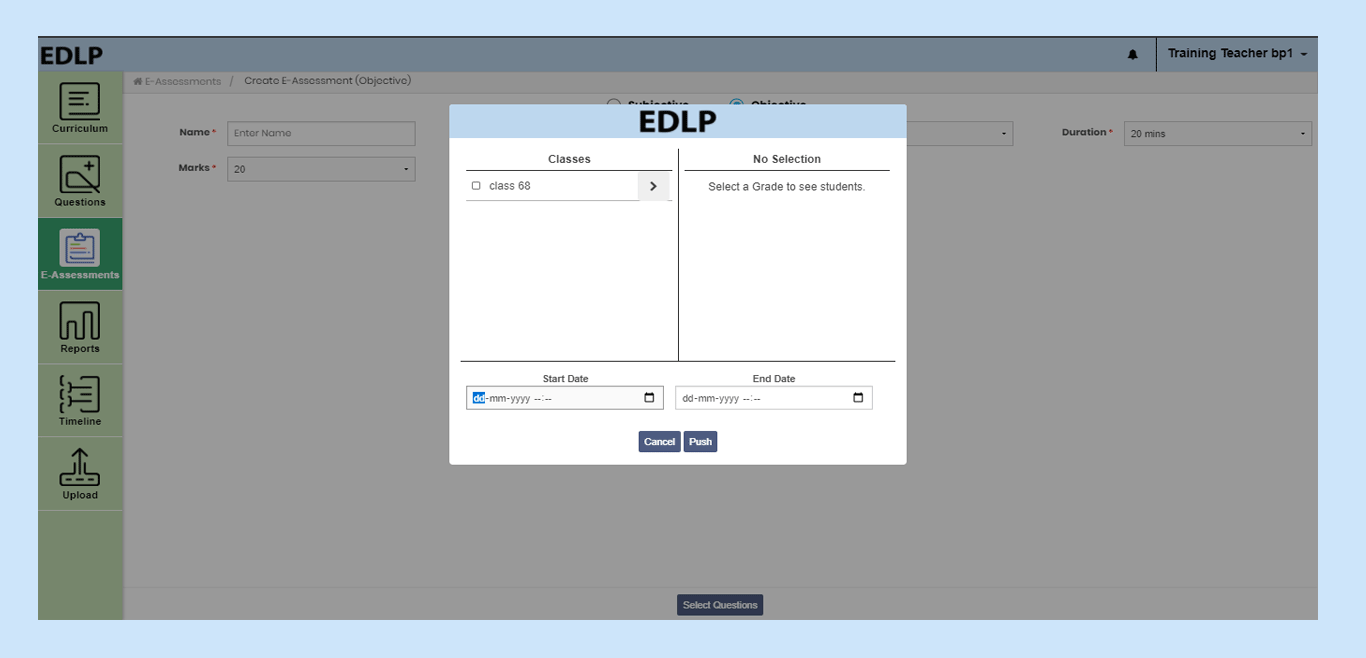 Pic 12: Create & Push a subjective E-Assessment
2. Viewing created E-Assessments
Once you click on “View E-Assessment”, you will be given a choice to choose one from either of the categories i.e., Subjective and Objective. By default, Objective type is selected.
2.1 Subjective:
When you select the Subjective type in View Assessments module, the screen will display all the created Subjective E-Assessments with respective filters along with “Pushed” and “Unpushed” buttons. By default, the last selection option “Unpushed/Pushed” is selected.
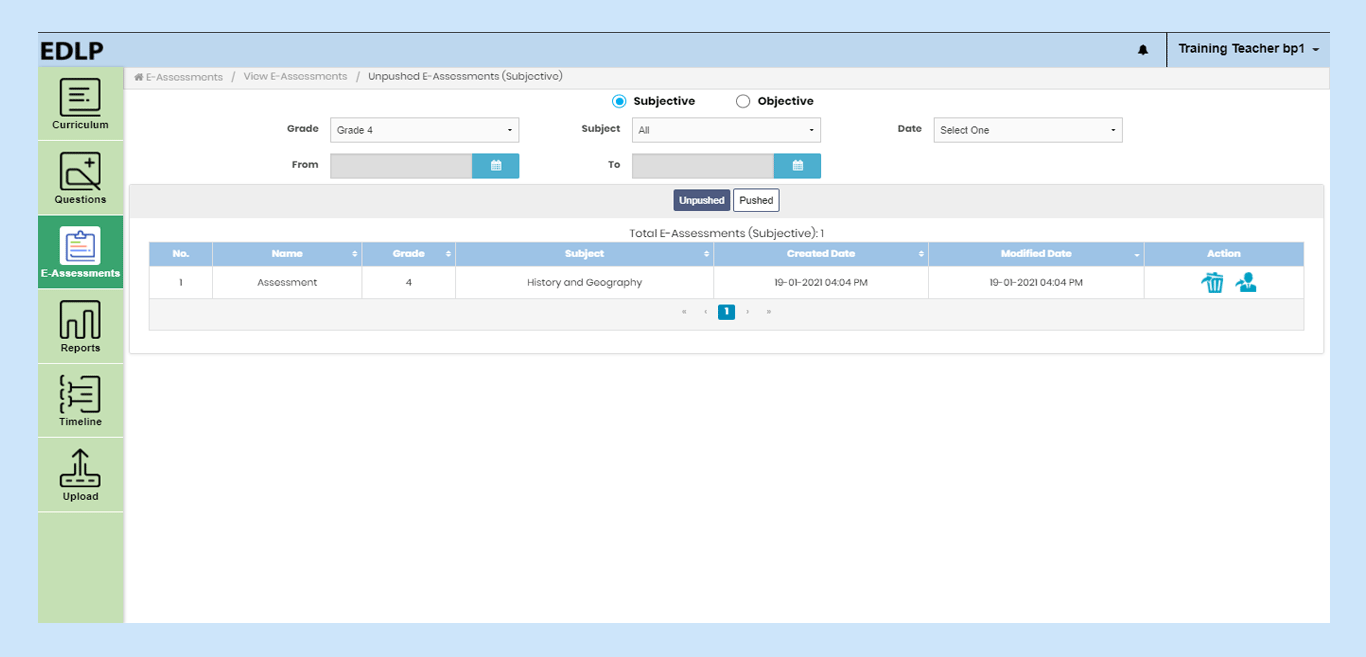 Pic 13: View Unpushed Subjective E-Assessments table
On the viewing screen, you will be able to view data tables that show the status of the E-assessments. The pushed table contains the data which is already pushed (published) to the students and the unpushed table contains the data which is not pushed (published) to the students. These tables contain the following headers:
- No: Shows the Record Number / Serial Number of the E-Assessment
- Name: Name given to the E-Assessment
- Grade: Represents the Grade for which the E-Assessment is created for
- Subject: Subject associated with the E-Assessment
- Created Date: Represents the date of creation of the E-Assessment
- Modified Date: Represents the date when the E-Assessment was last modified, this feature is available only in the “Unpushed” tab.
- Start Date: Represents the date assigned for the E-Assessments made available for students, this feature is available only in the “Pushed” tab.
- Due Date shows the End date of the e-assessment which is displayed only in Pushed tab
- Action is classified into two parts:
- Actions for Unpushed
- Actions for Pushed
| Actions for Unpushed | Actions for Pushed |
| Delete | Submission Details |
| Push | Re-push |
- Actions for Unpushed:
- If you click on the Assessment, you will be directed to a window which will allow you to edit/modify the Assessment. This screen is like “Create Assessment” screen with options like save, save & push and print available.
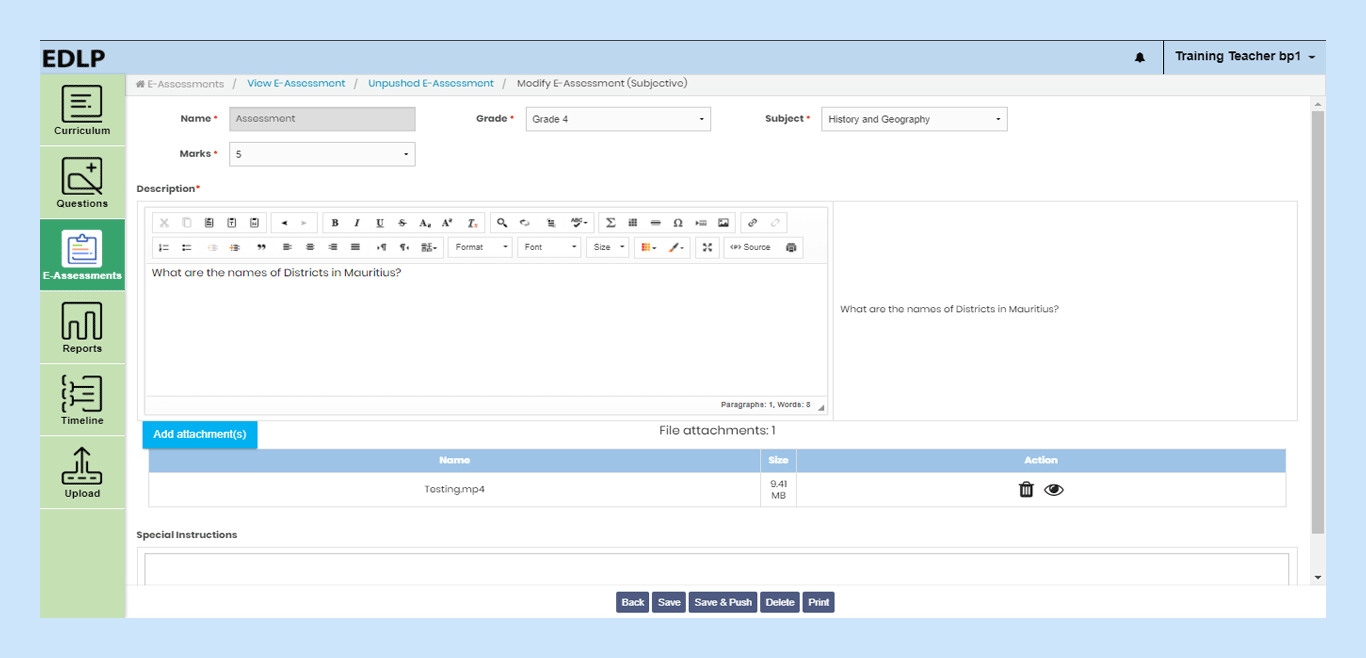 Pic 14: Modify subjective unpushed e-assessment
1. Clicking the “Push” icon will allow you to assign this selected E-Assessment to a given set of students, individually or entire section for a given date and time.
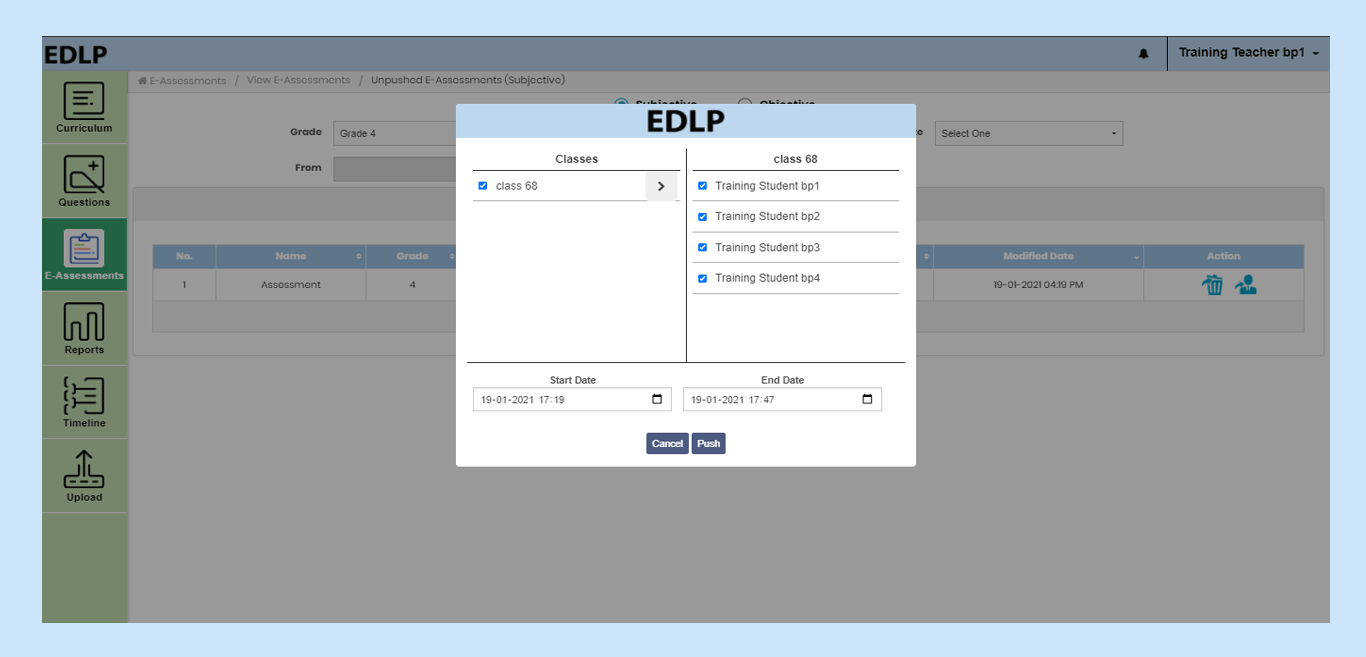 Pic 15: Push a subjective e-assessment from unpushed e-assessments
1. Clicking on the “Delete” icon will allow you delete the unpushed E-Assessment.
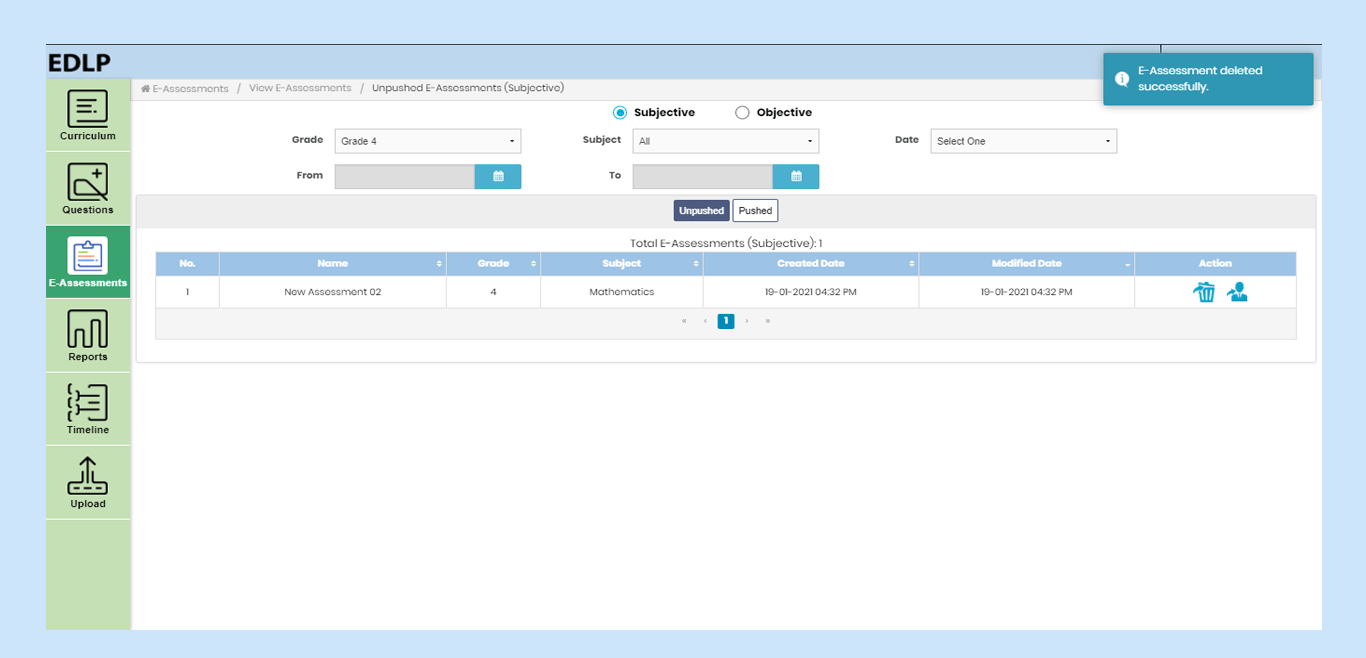 Pic 16: Delete a subjective e-assessment from unpushed e-assessments
- Actions for Pushed:
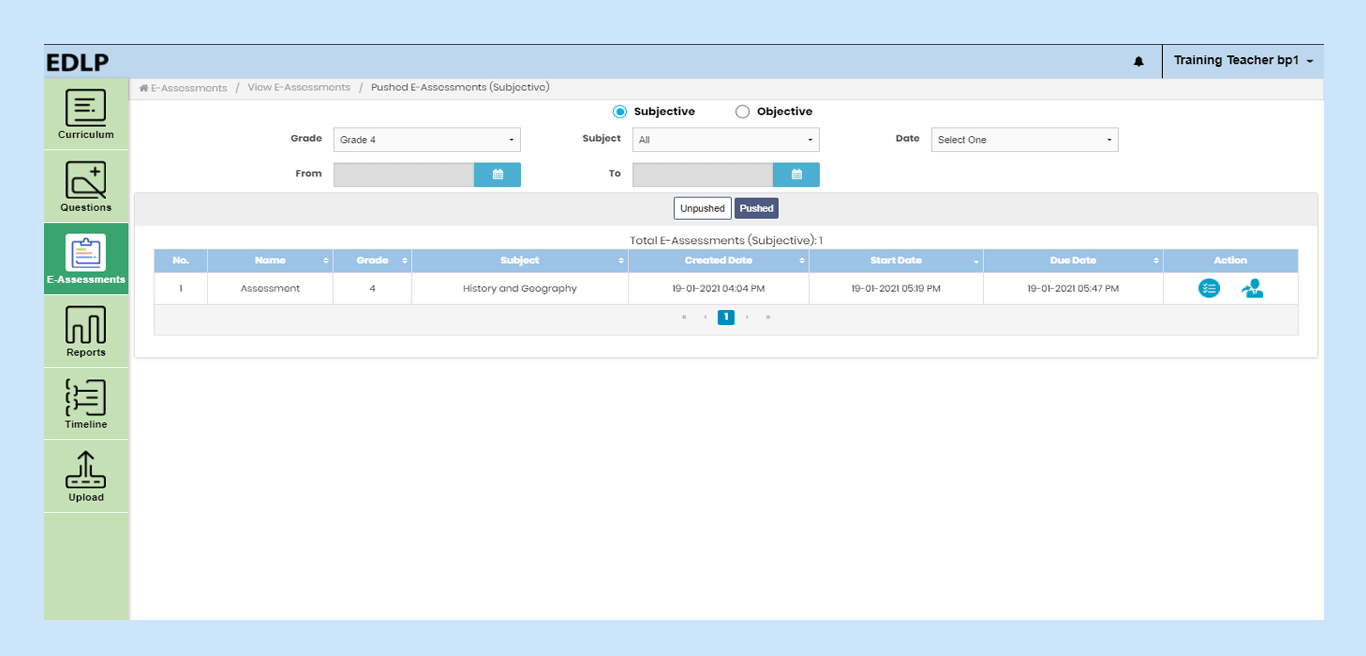 Pic 17: View Subjective Pushed E-Assessments table
1. By clicking on an E-Assessment from tabulated pushed E-Assessments, that E-assessment will open on the screen with two options “Back” and “Print”.
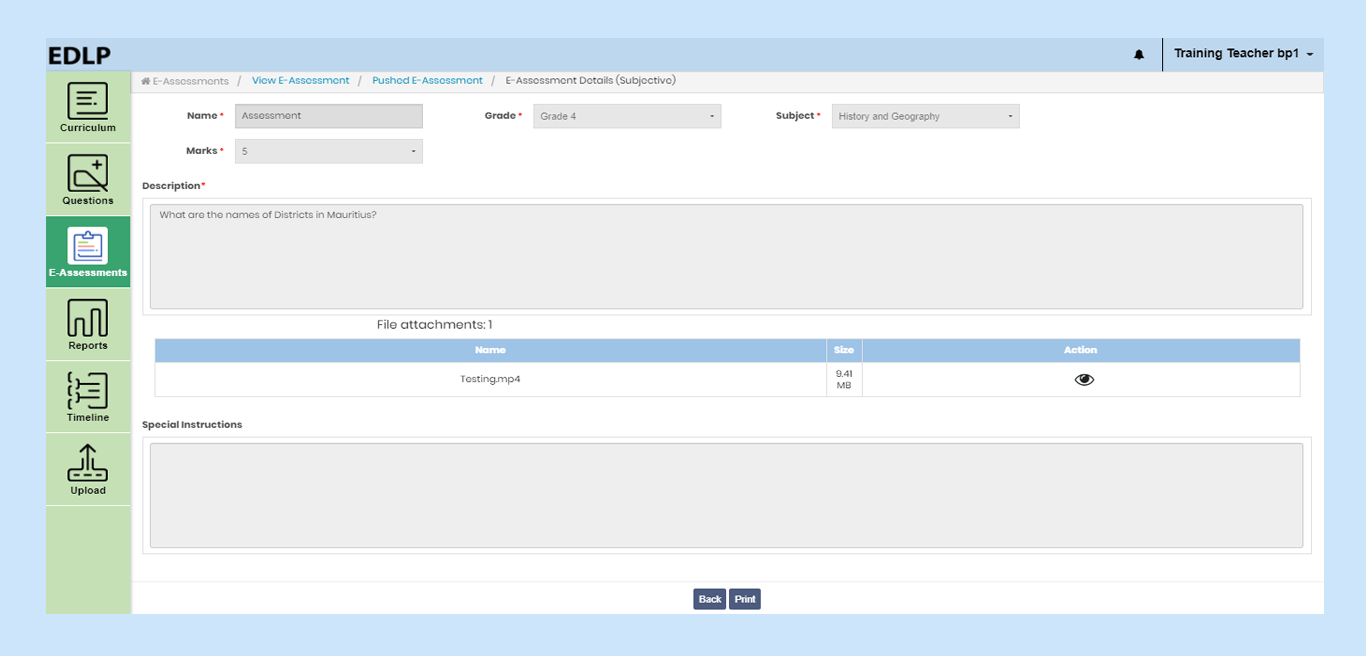 Pic 18: Subjective Pushed E-Assessment Details
1. Submission details can be found in the respective record action column, by clicking on this button, you will be navigated to E-Assessment submissions screen.
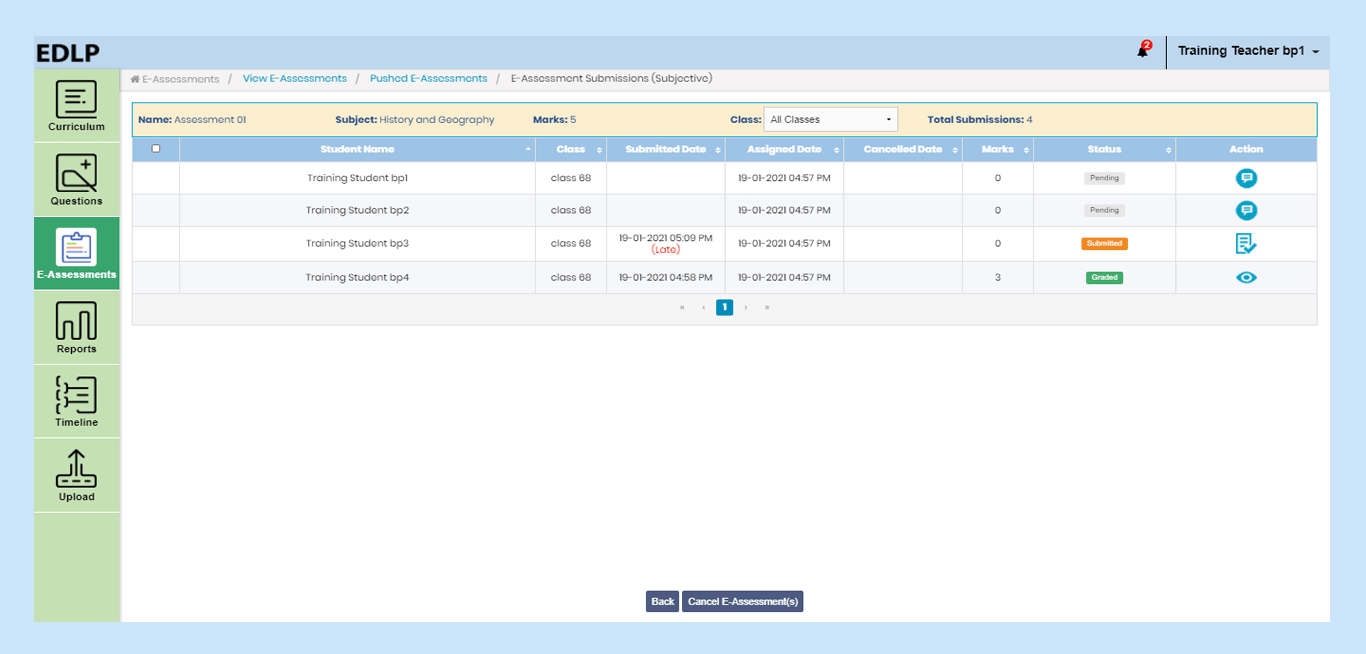 Pic 19: Subjective E-Assessment Submission Detail
This new screen will display the following headers in tabular form
- Assigned Date: This denotes the start date of the E-Assessment
- Submitted Date: This denotes the date when the student submitted the E-Assessment
- Cancelled Date: This denotes the date when the E-Assessment was cancelled
- Status: This denotes the status of the E-Assessment submission by the students.
Orange: submitted
Grey: Pending
Red: Cancelled
Green: Graded
- Action: This consists of a button and 2 hyperlinks based on the Status. If the status is “Pending”, a “Push” icon will be assigned next to it. If the status is “Submitted” a “Grade” hyperlink will be assigned to it. If the status of “Graded”, a “Review” hyperlink will be assigned next to it.
If you click on “Submitted” icon, you will be navigated to a page where you can assign marks to the students E-Assessment submission. You will have accesses to resources like student response, attachment(s) if any, and grade/back buttons. Grade the student’s E-Assessment on this page, and assign the desired marks based on the performance. Once done, click on “Grade” to submit your response.
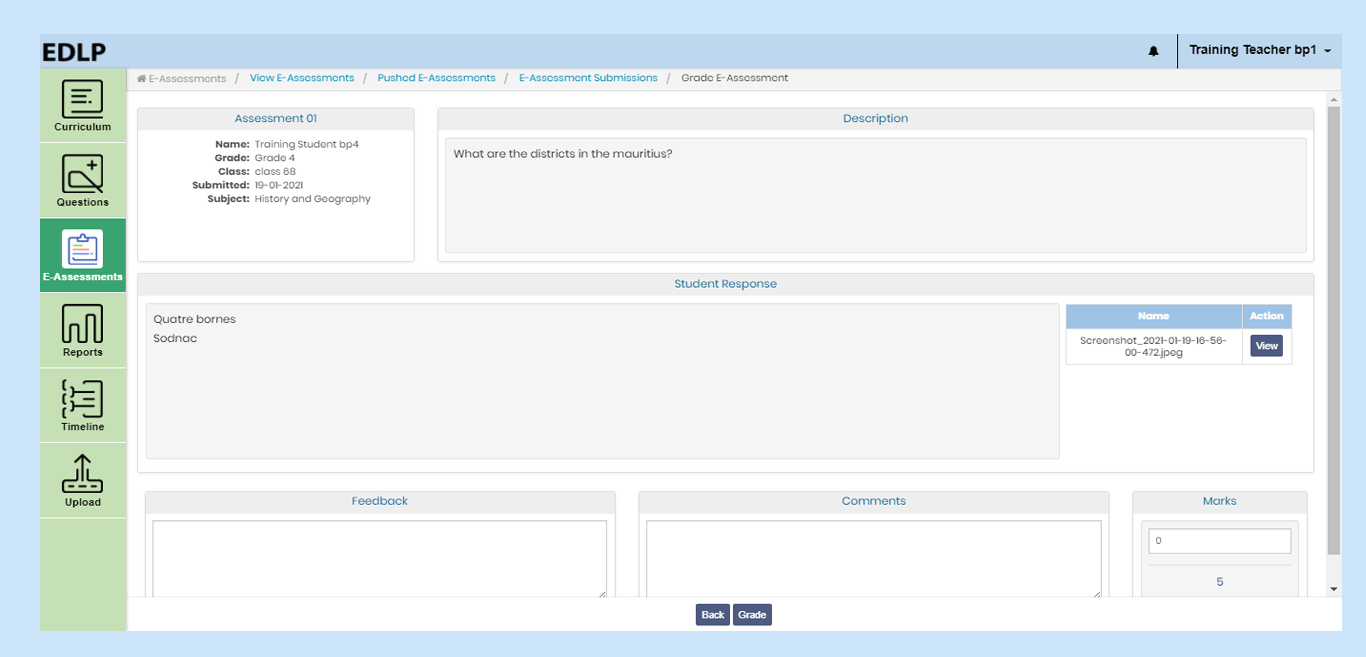 Pic 20: Grade Subjective E-assessment
 Pic 21: Assigning marks to the student
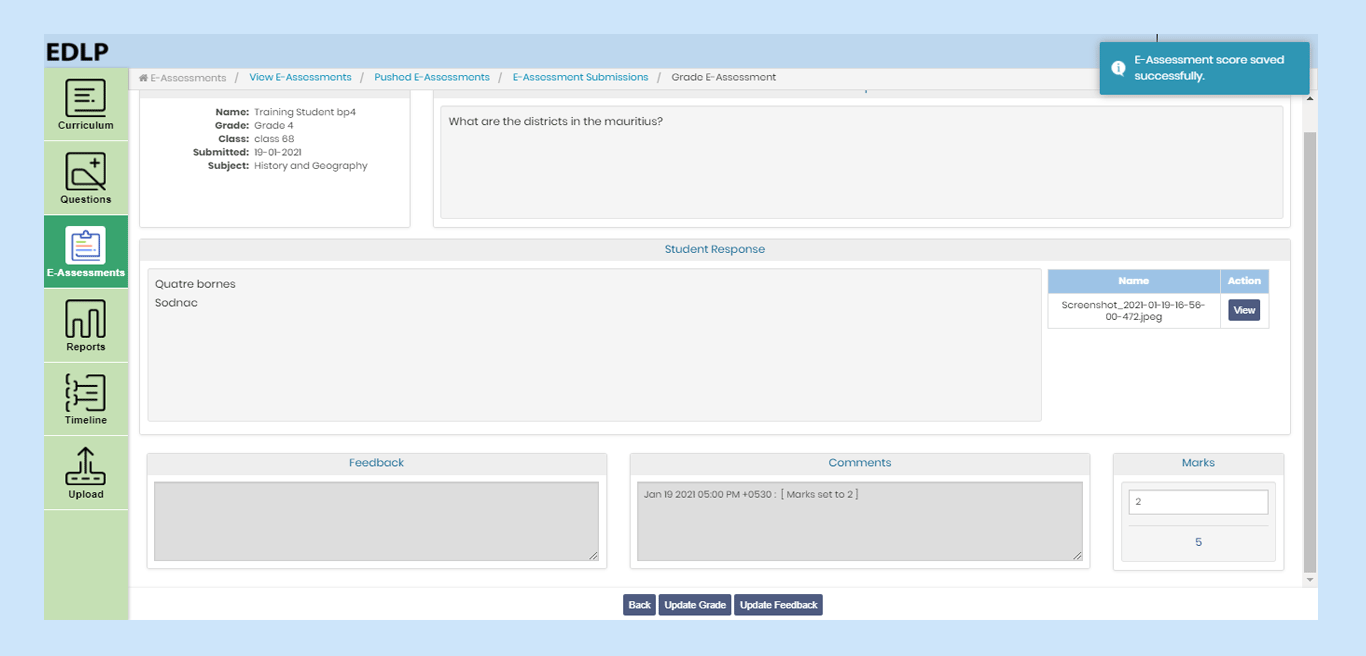
After assigning the grade, you can “Update Grade” and “Feedback” by using the respective radio buttons. This feature allows you to modify previous changes in grading and feedback.
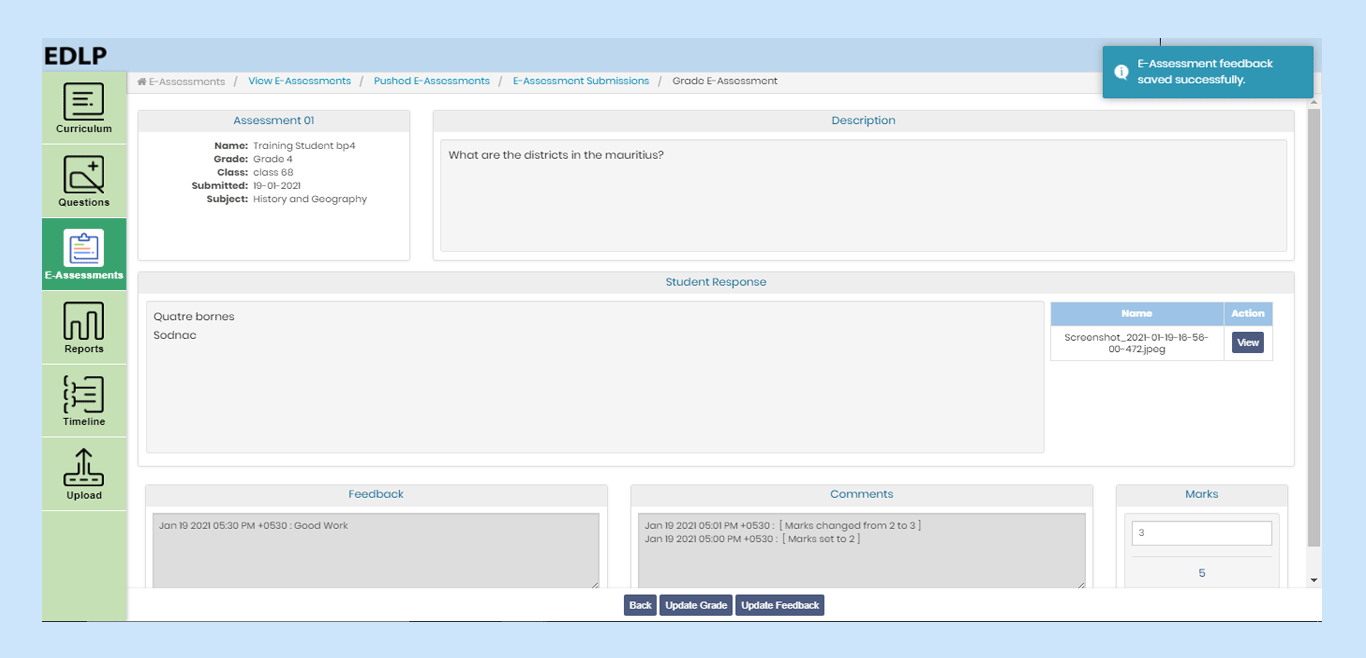 Pic 22: Updating the Feedback and marks
1. Repush: Using this feature, any pre-pushed E-Assessment can be pushed again and made available for students.
 Pic 23: Repush Subjective E-assessment
1. Cancel: Using this feature, any pushed E-Assessment can be cancelled and made unavailable for students. This can be done for a single student or set of students. Once an Assessment is cancelled, additional details like “Cancelled Date” and “Status” will be visible.
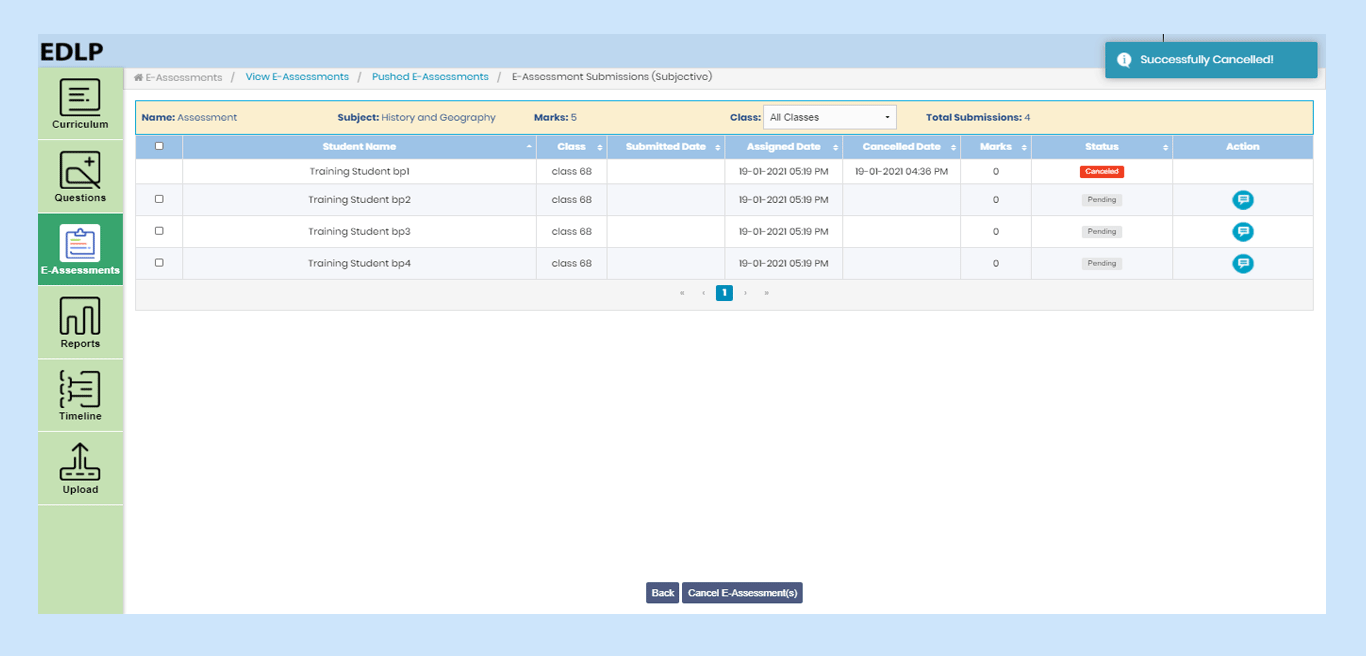 Pic 24: Cancel E-assessment to set(s) of students
2.2 Objective:
When you select the Objective type in View Assessments module, the screen will display all the created Objective E-Assessments with respective filters along with “Pushed” and “Unpushed” buttons. By default, the last selection option “Unpushed/Pushed” is selected.
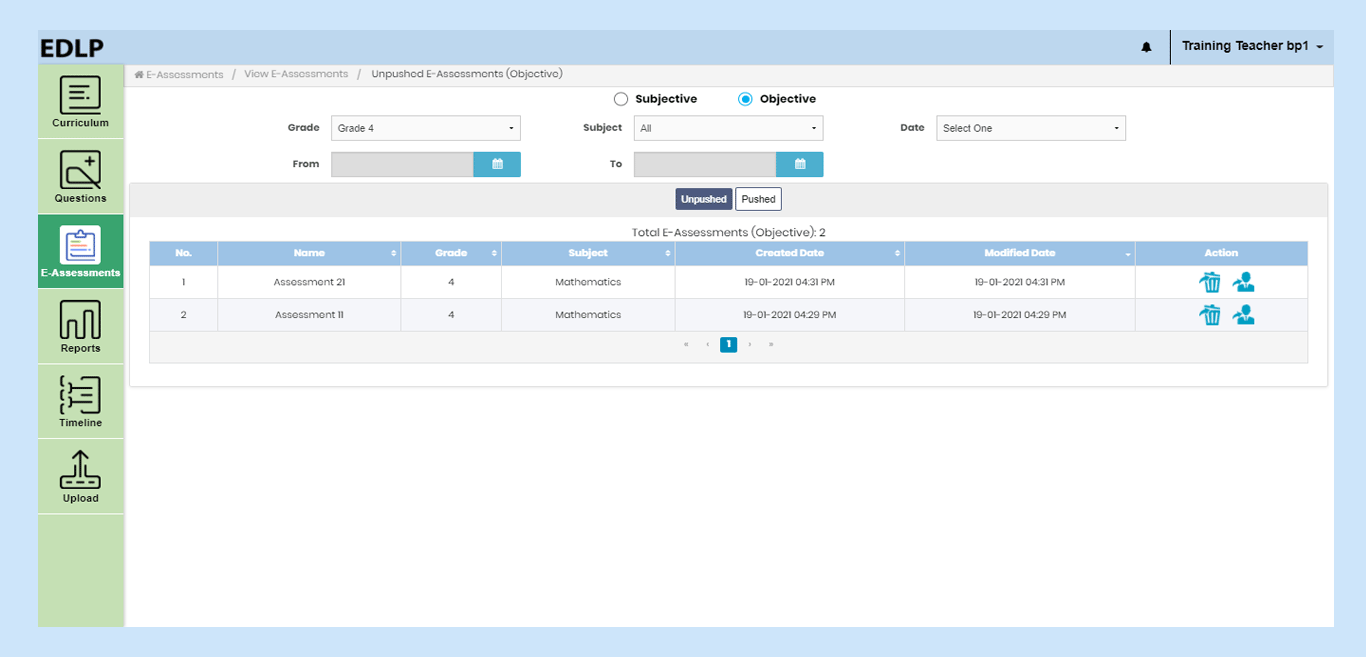 Pic 25: View Unpushed objective E-Assessments table
On the viewing screen, you will be able to view data tables that show the status of the E-assessments. The pushed table contains the data which is already pushed (published) to the students and the unpushed table contains the data which is not pushed (published) to the students. These tables contain the following headers:
- No: Shows the Record Number / Serial Number of the E-Assessment
- Name: Name given to the E-Assessment
- Grade: Represents the Grade for which the E-Assessment is created for
- Subject: Subject associated with the E-Assessment
- Created Date: Represents the date of creation of the E-Assessment
- Modified Date: Represents the date when the E-Assessment was last modified, this feature is available only in the “Unpushed” tab.
- Start Date: Represents the date assigned for the E-Assessments made available for students, this feature is available only in the “Pushed” tab.
- Due Date shows the End date of the e-assessment which is displayed only in Pushed tab
- Action is classified into two parts:
- Actions for Unpushed
- Actions for Pushed
| Actions for Unpushed | Actions for Pushed |
| Delete | Submission Details |
| Push | Re-push |
- Actions for Unpushed:
If you click on a particular unpushed e-assessment row, it will navigate you to the modify e-assessment screen here you can view the e-assessment details which are filled by you earlier in create e-assessment section. You can edit the details and after some modifications you can save the data by clicking on save /save & push button or you can select questions few more questions, delete and take print using select questions, delete and print buttons respectively.
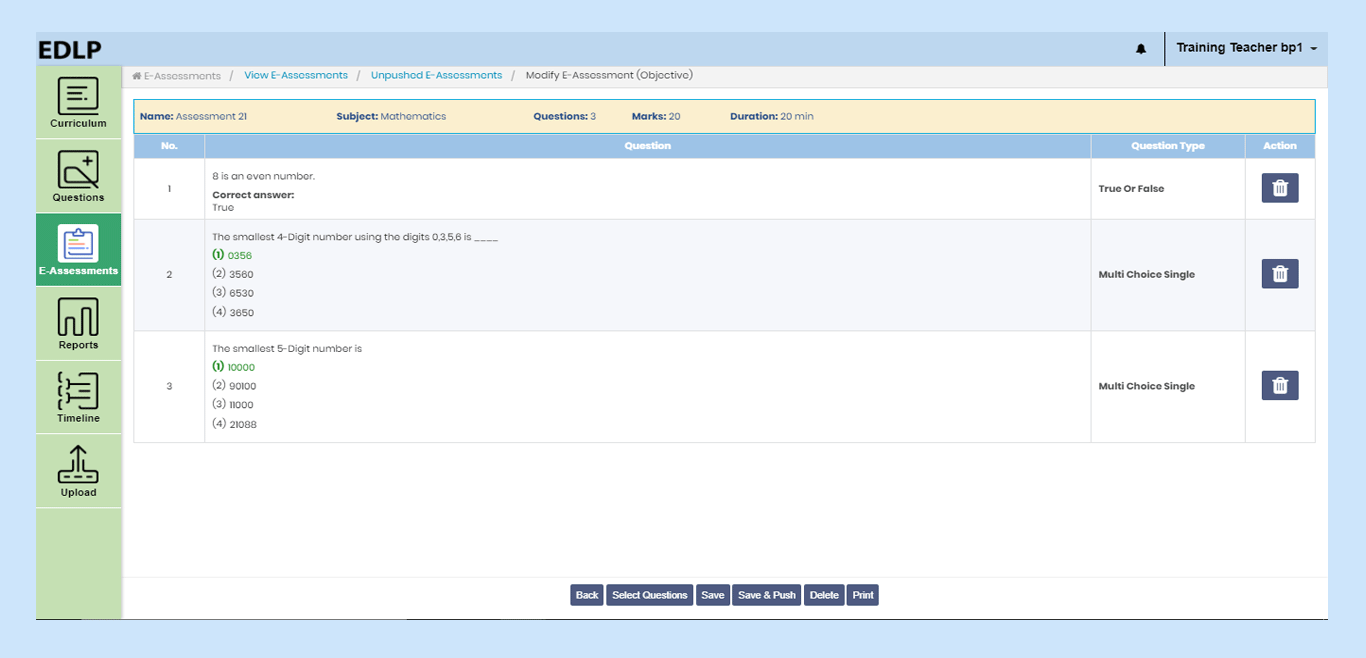 Pic 26: Modify objective unpushed e-assessment
Push: It is a button which is at unpushed objective e-assessment respective record action column, when you click on this button it will show the Push E-Assessment screen by selecting the section and start and end date and time you can push the E-assessment to the students
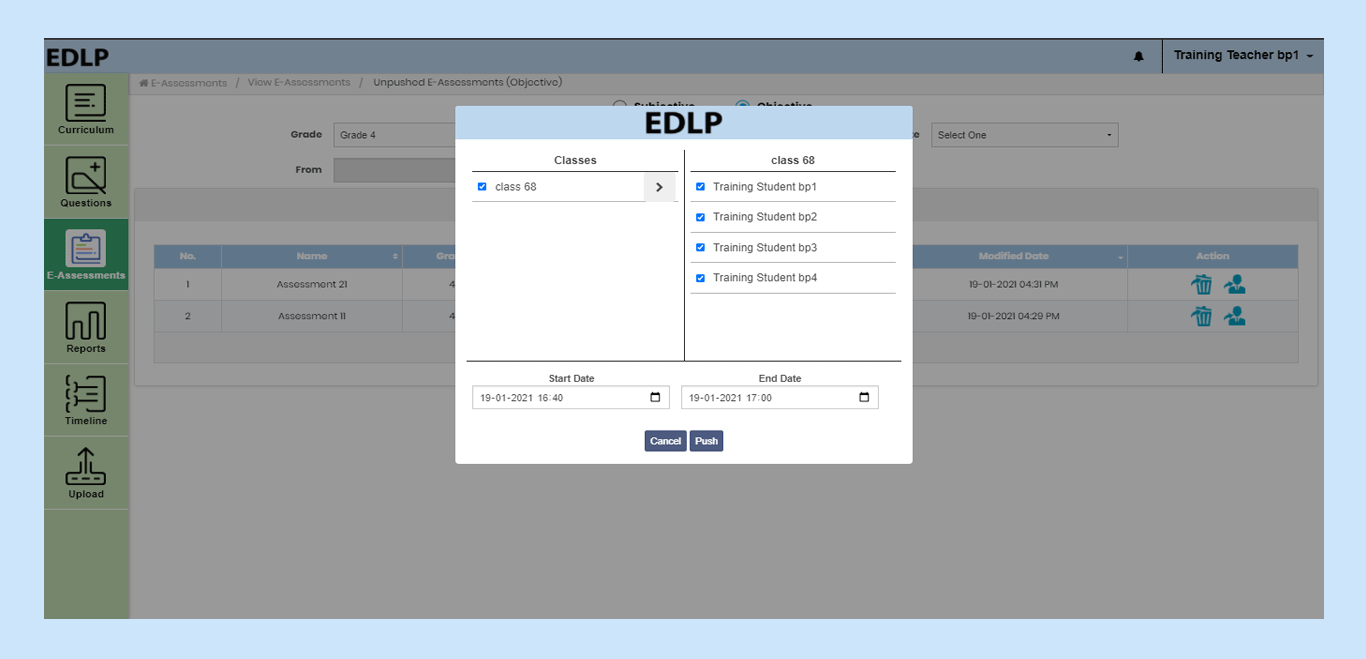 Pic 27: Push objective e-assessment from unpushed e-assessments
Delete:
This icon is used to delete the unpushed E-Assessment from the view E-Assessment table.
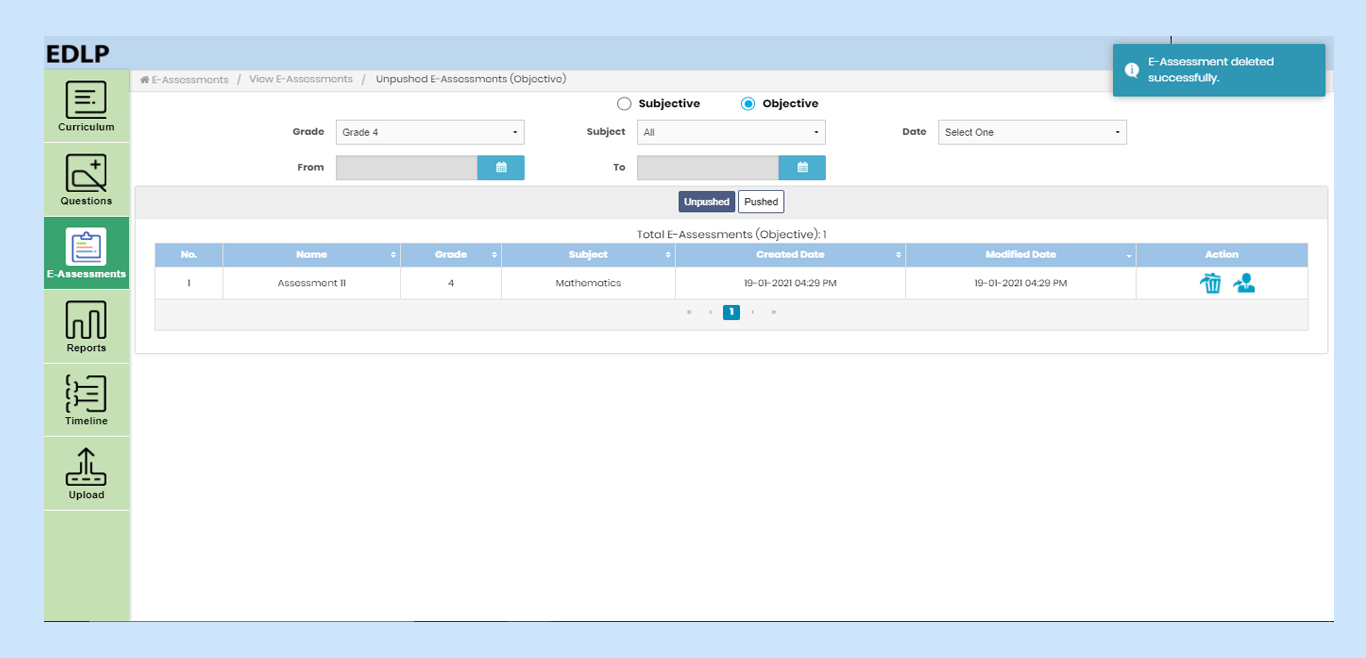 Pic 28: Delete objective e-assessment from unpushed e-assessments
- Actions for Pushed:
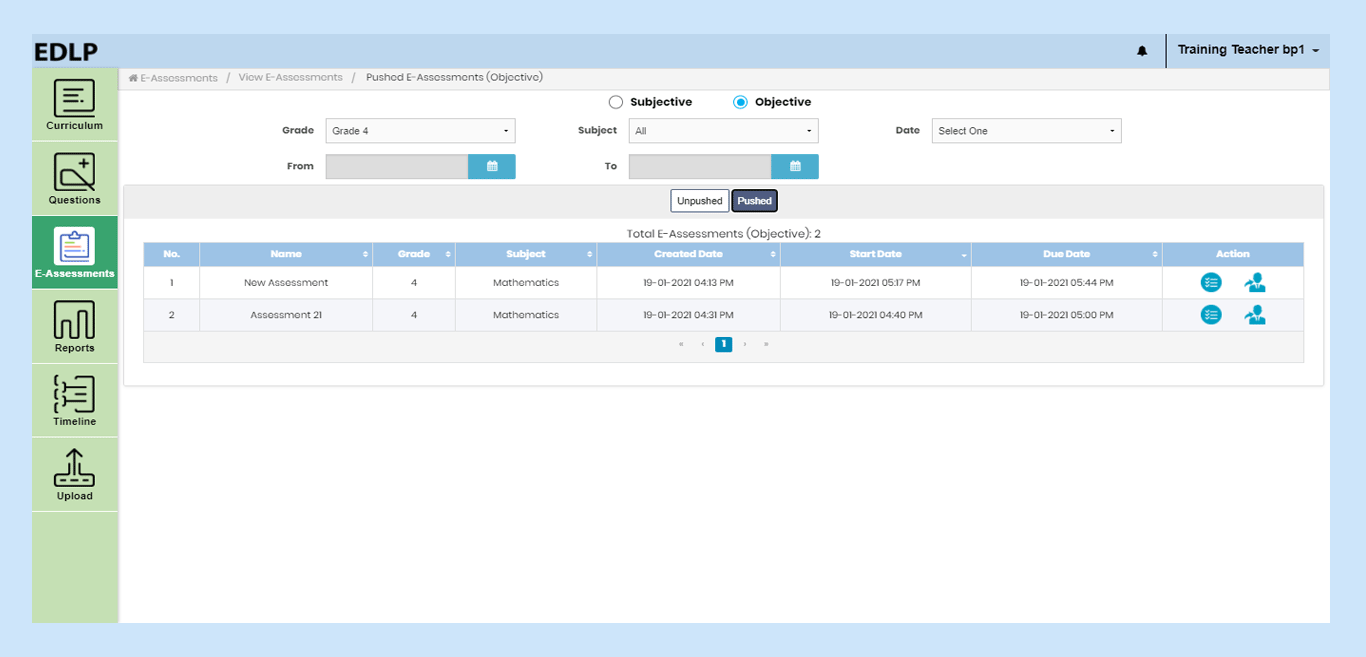 Pic 29: View objective Pushed E-Assessments table
If you click on a particular e-assessment from tabulated pushed e-assessments, then it displays e-assessment details with Back and Print buttons.
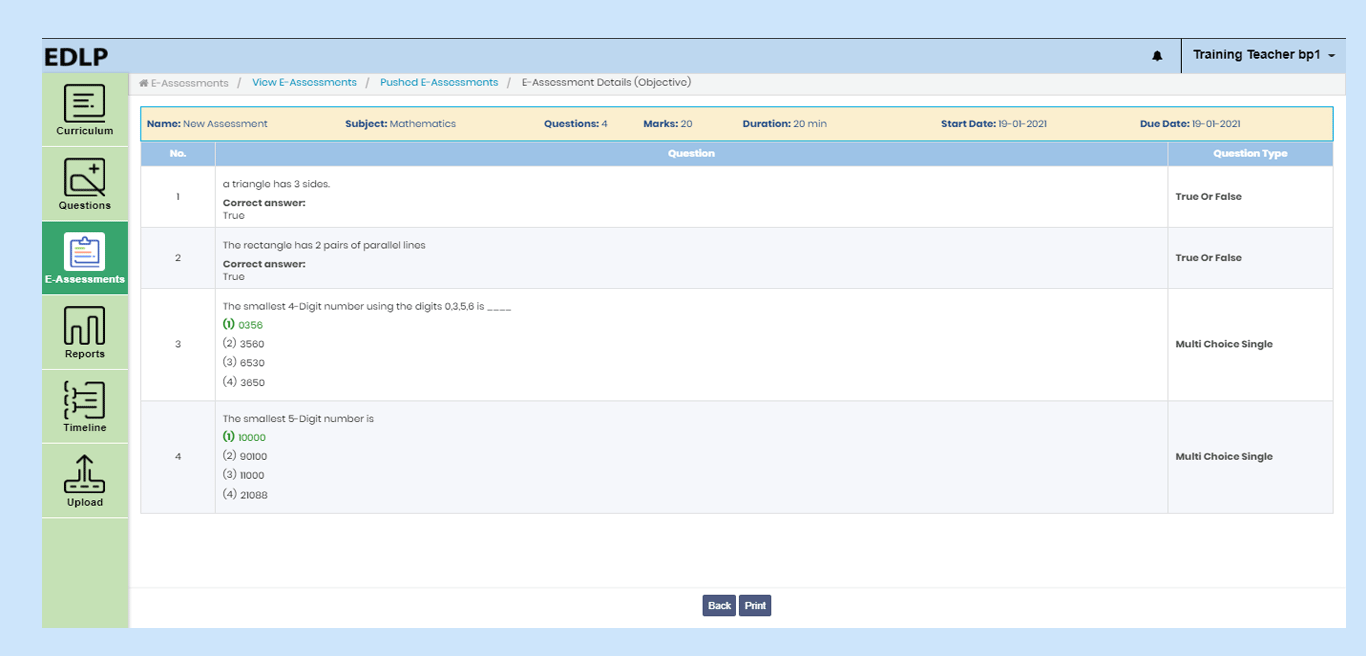 Pic 30: Objective Pushed E-Assessment Details
1. Submission details can be found in the respective record action column, by clicking on this button, you will be navigated to the E-Assessment submissions screen.
 Pic 31: Objective E-Assessment Submission Details
- Assigned Date: This denotes the start date of the E-Assessment
- Submitted Date: This denotes the date when the student submitted the E-Assessment
- Cancelled Date: This denotes the date when the E-Assessment was cancelled
- Status: This denotes the status of the E-Assessment submission by the students.
Grey: Pending
Red: Cancelled
Green: Graded
- Action: This consists of a button and 2 hyperlinks based on the Status. If the status is “Pending”, a “Push” icon will be assigned next to it. If the status of “Graded”, a “Review” hyperlink will be assigned next to it.
If you click on “Graded” icon, you will be navigated to review page where you can update grade of the students E-Assessment submission.
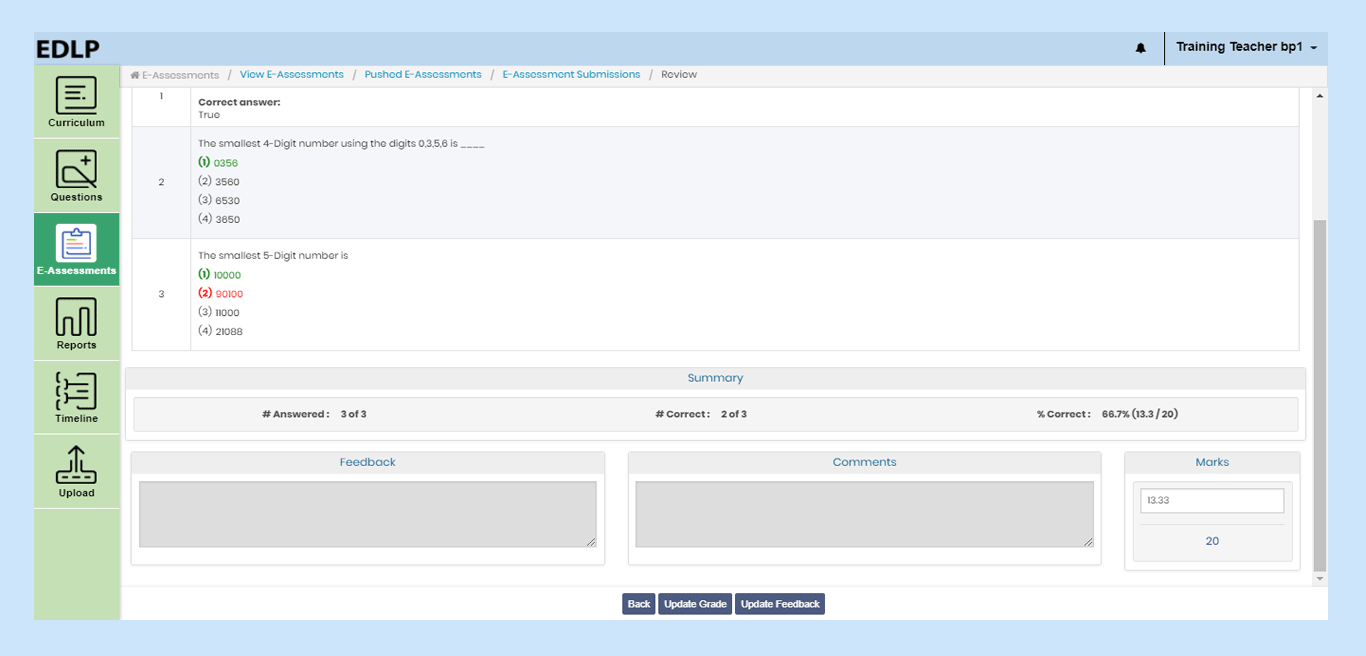 Pic 32: Review Objective E-assessment
You can “Update Grade” and “Feedback” by using the respective buttons. This feature allows you to modify previous changes in grading and feedback
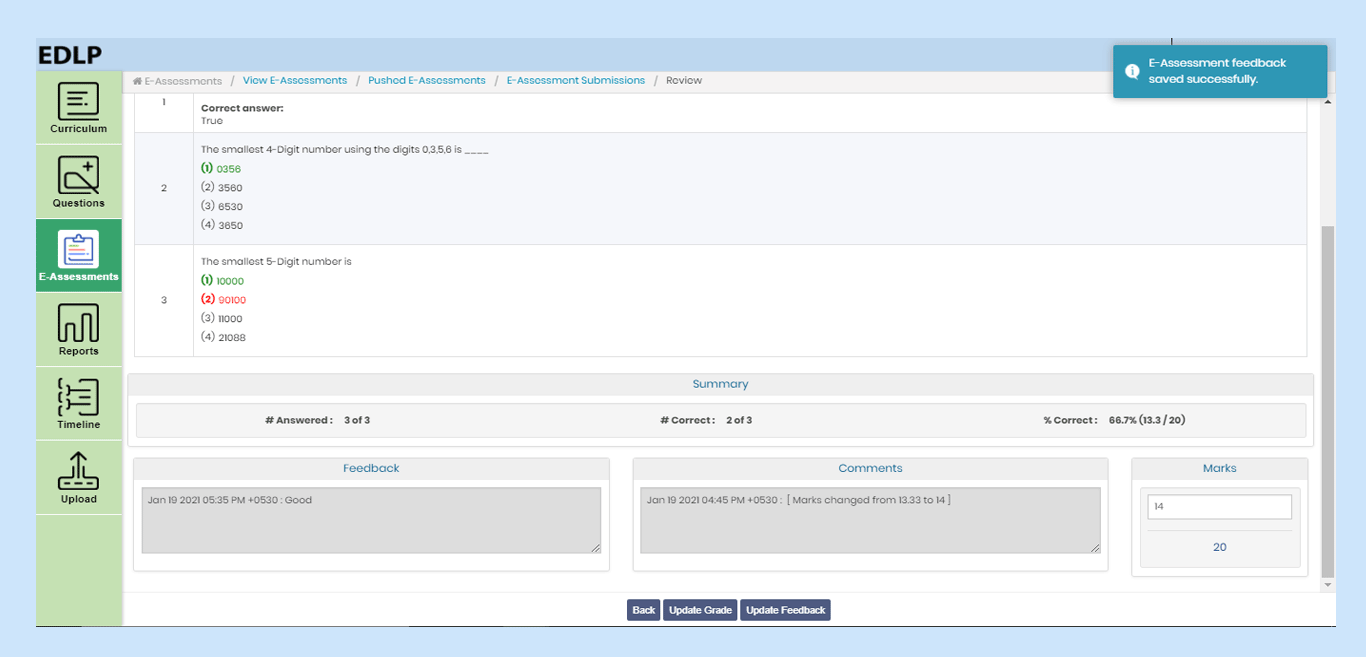 Pic 33: Updating the Feedback and Grade
- Repush
Using this feature, any pre-pushed E-Assessment can be pushed again and made available for students.
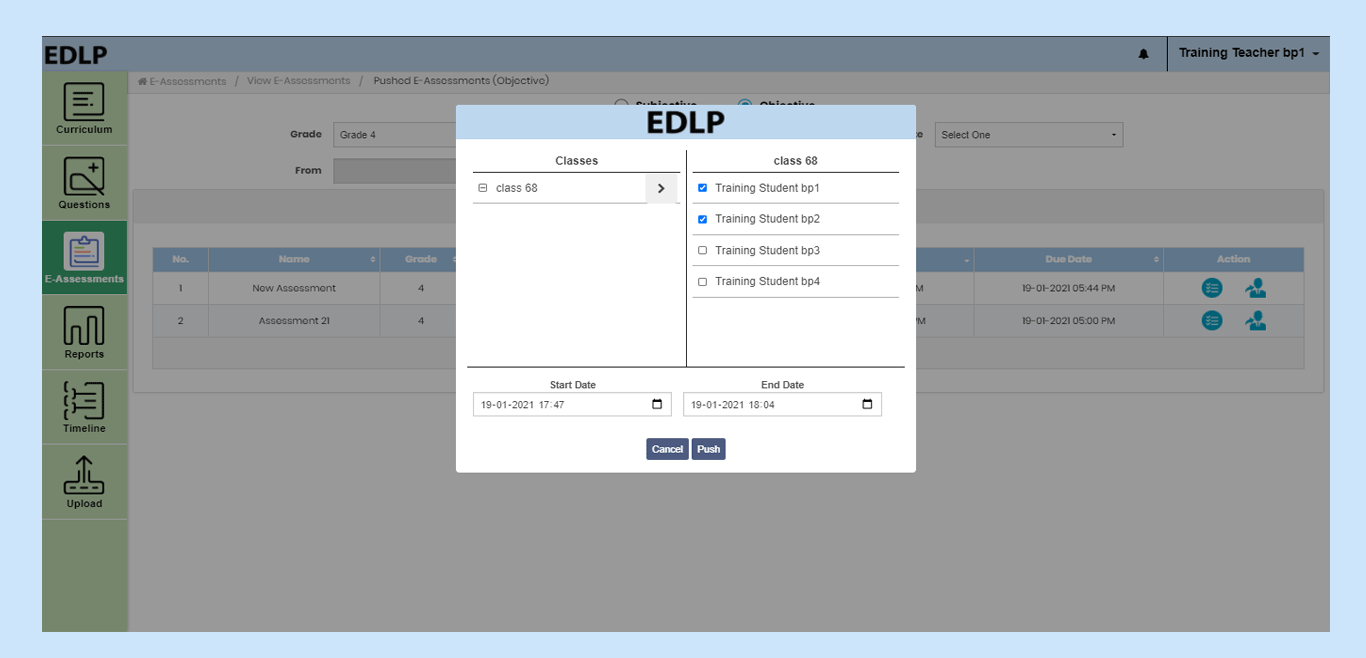 Pic 34: Repush Subjective E-assessment
- Cancel
Using this feature, any pushed E-Assessment can be cancelled and made unavailable for students. This can be done for a single student or set of students. Once an Assessment is cancelled, additional details like “Cancelled Date” and “Status” will be visible.
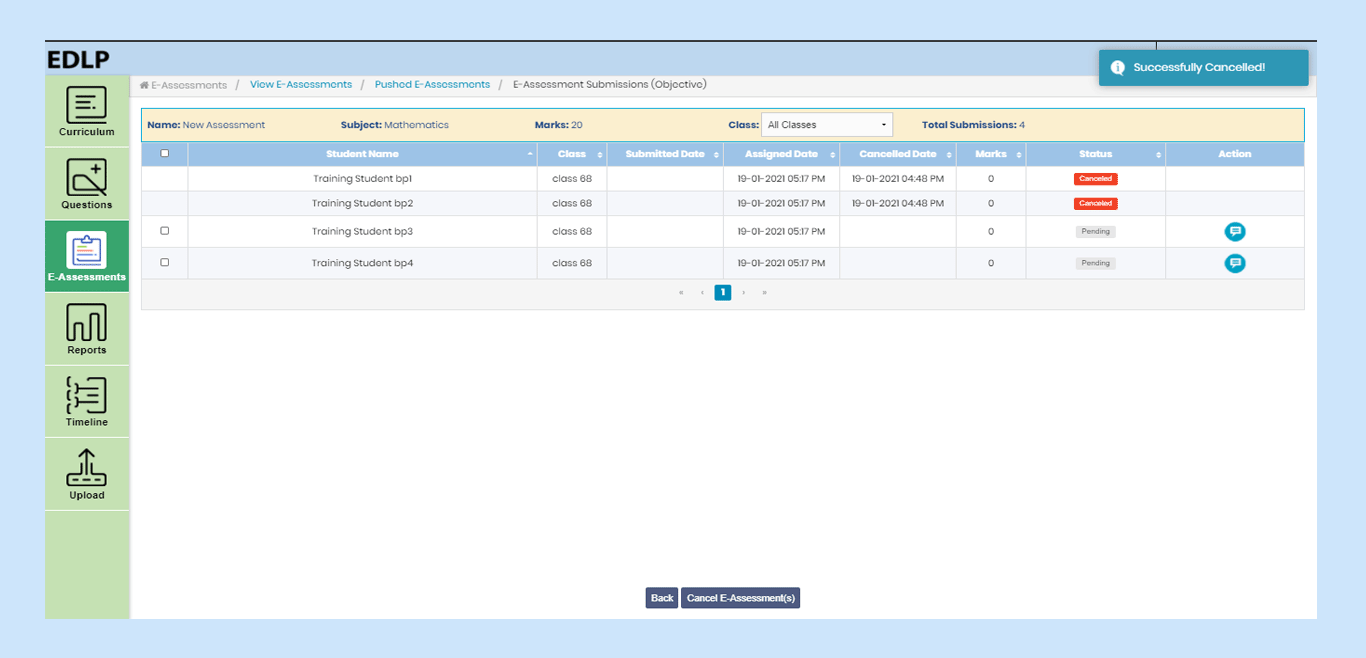 Pic 35: Cancel E-assessment to set(s) of students.