


Modified: October 19, 2021
1. Creating Questions
A question can be created using this module. All the mandatory fields i.e., subject, question type, question description, options, and correct answer. Once a question is created, 4 options will be made available to move to the next step, i.e., Preview, Preview & Save, Save and Clear.

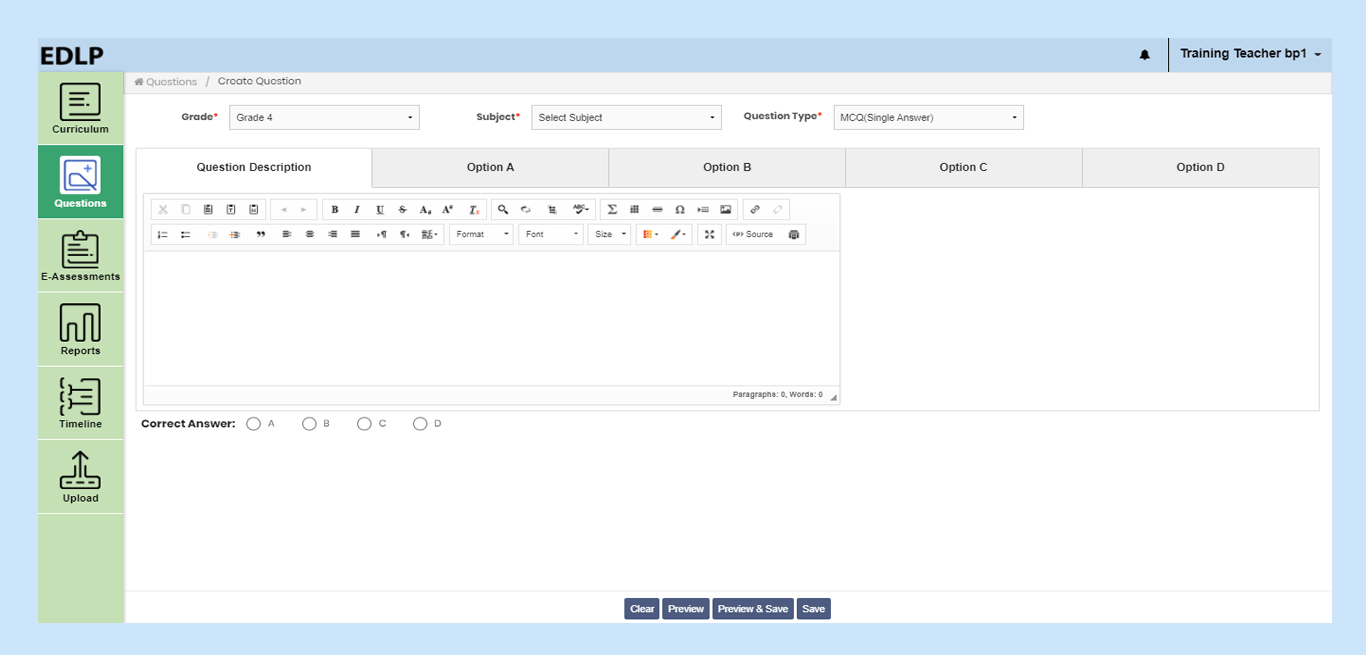 Pic 01: Create Questions
Two types of questions can be created:
- MCQ (Single answer question)
- True or False
Creating MCQ (Single answer question)
 Pic 02: MCQ (Single Answer)
Creating True or False
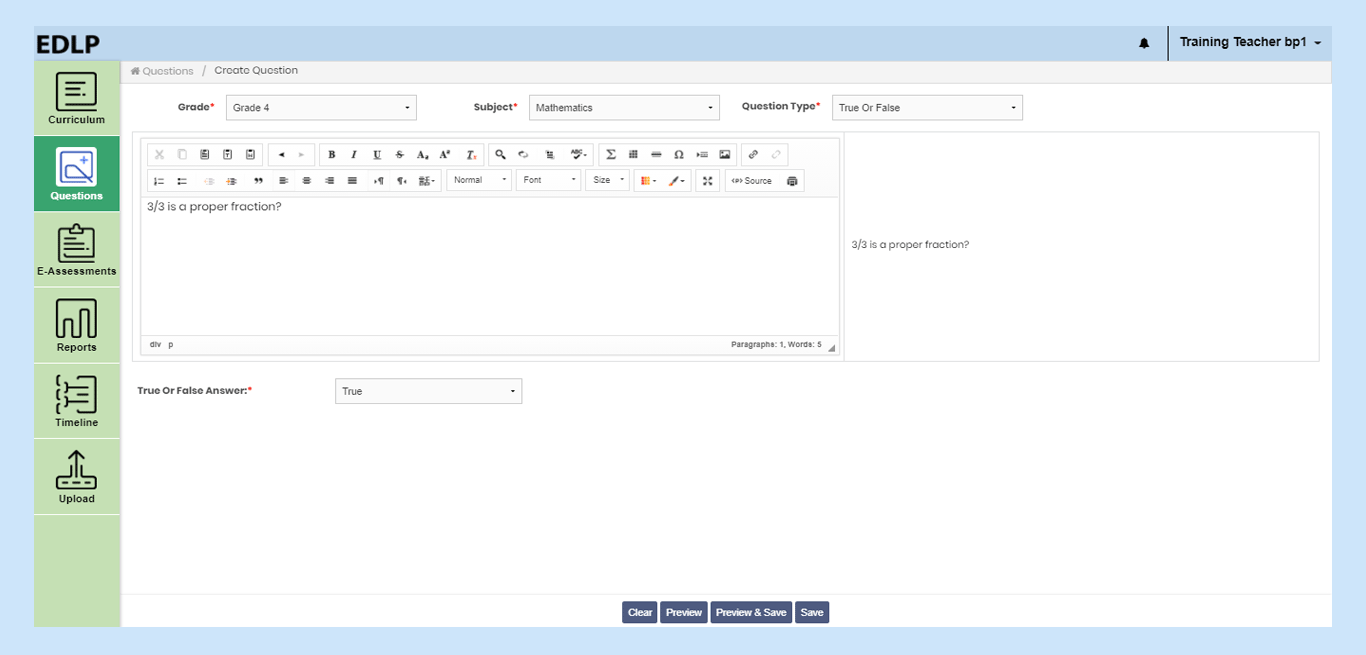 Pic 03: True or False
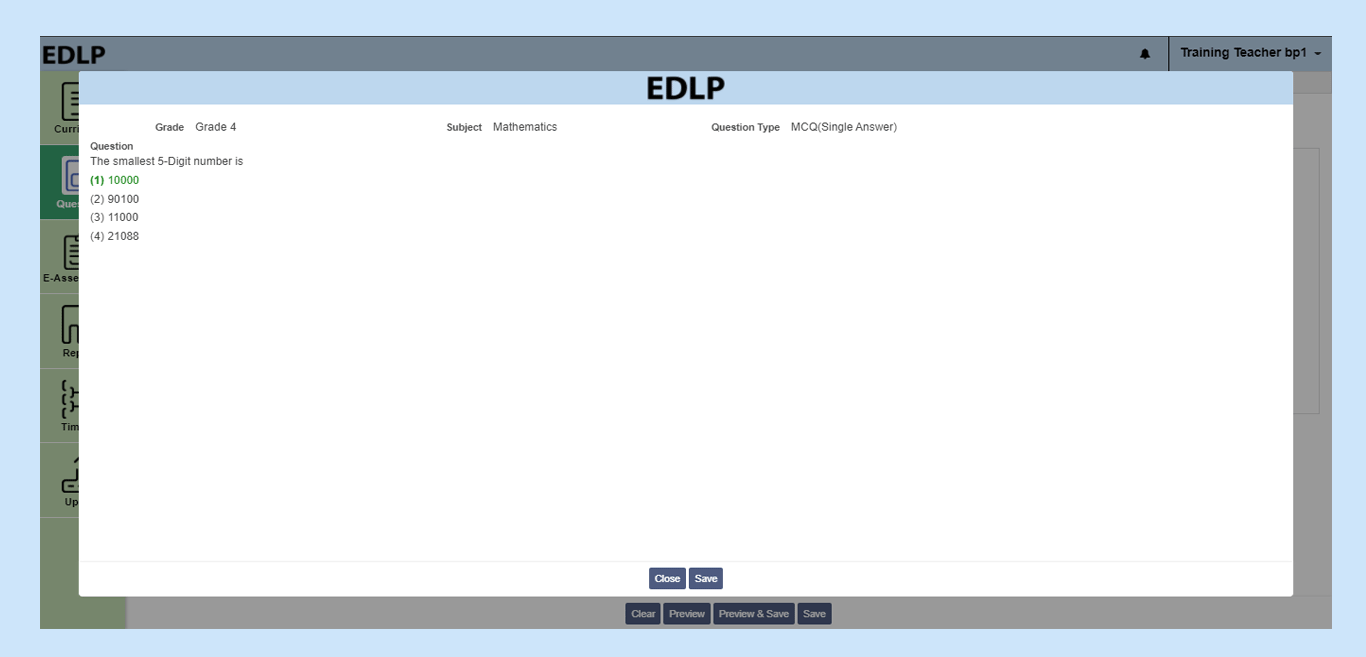
If you click on the Preview button, you will be able to see all the entered details.
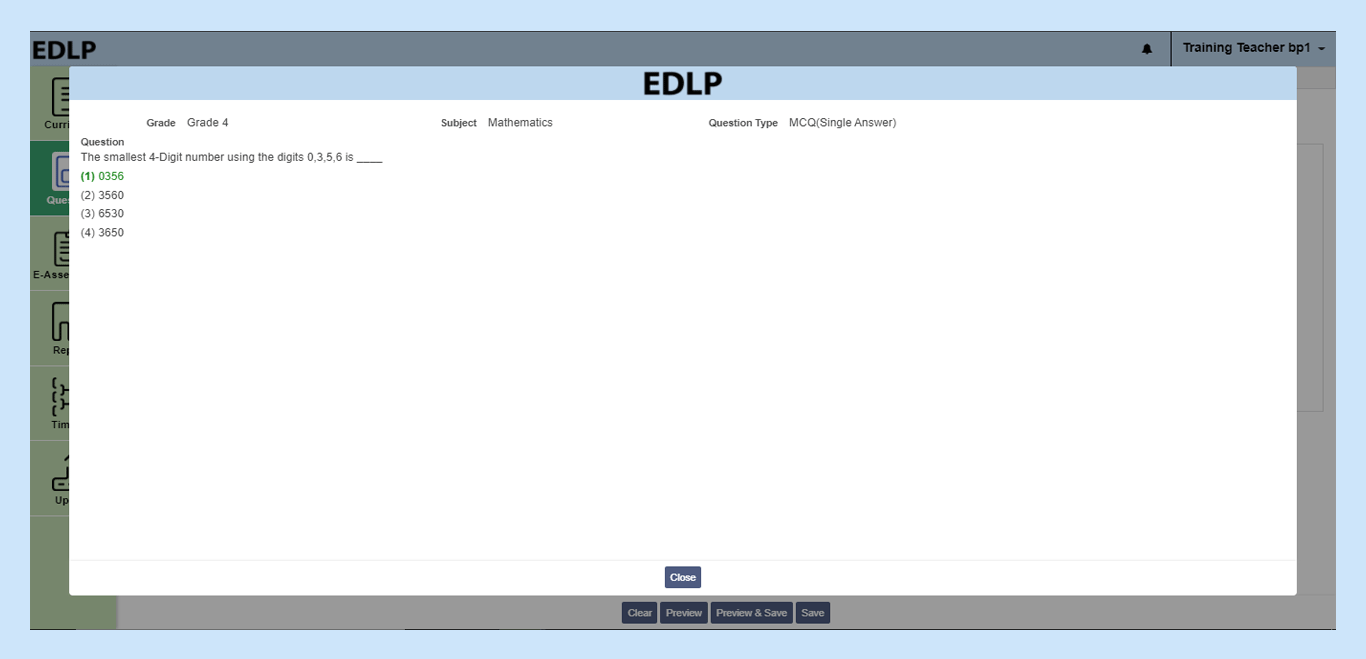 Pic 04: Preview of a Question
Save: By clicking this button, the question will be created & saved, and the screen will reset to default “create question” screen.
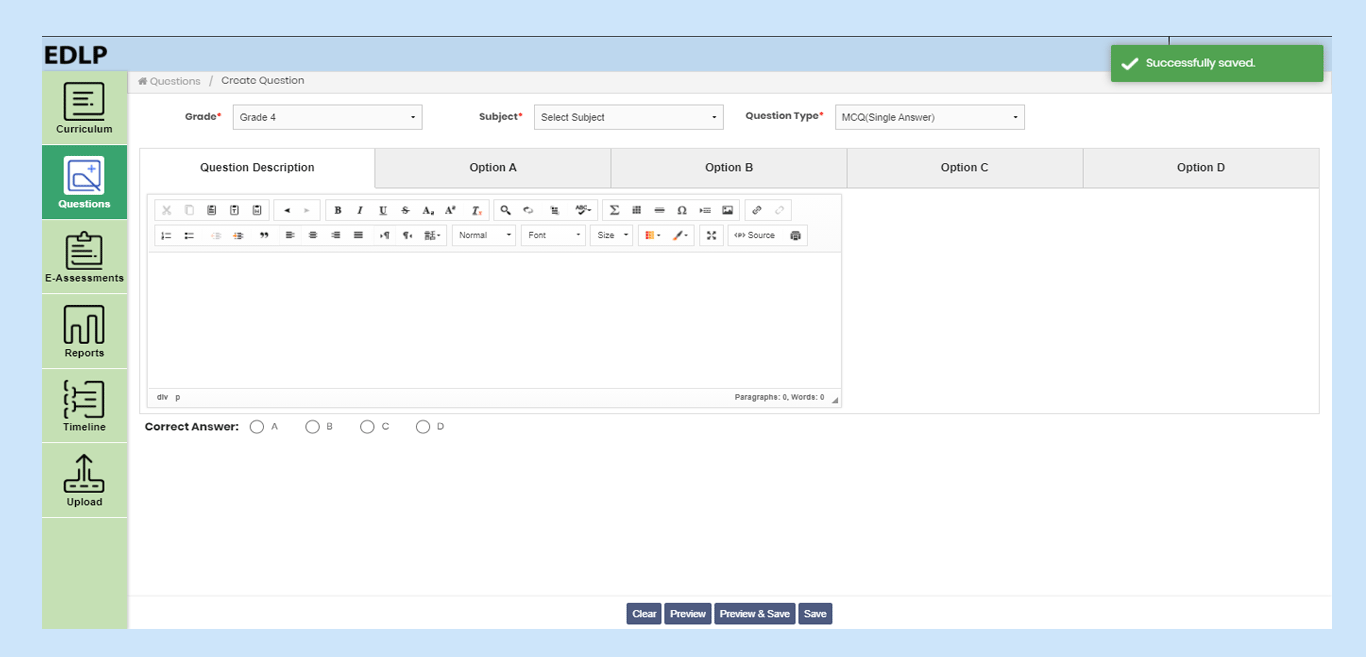 Pic 05: Save a Question
Preview and Save: By clicking this button, the created question can be viewed, and the user gets an option to “save” or “clear”. If you click on “save” the same process as above follows. If you click on “clear” the created question will not be saved and the default “create question” screen will appear.
Step 01: Go to Windows Settings → Time & Language → Languages
Step 02: Click on “Add a language” button, “choose a language to install” window will pop up
Step 03: In the Search bar, type required language (example: Creole French, Spanish etc.,) which you want to install in the System
Step 04: Click on Next and then you can see the “install” option. Click on Install
 Pic 06: Preview & Save a Question
2. Viewing Created Questions
This window shows all the questions created and saved. Any question can be searched using parameters like the subject, question type and created by. Click on “apply filter” to show the questions as per the above filters. “Clear Filter” can be used to clear any previously applied filters and for initiating a new filtered search.
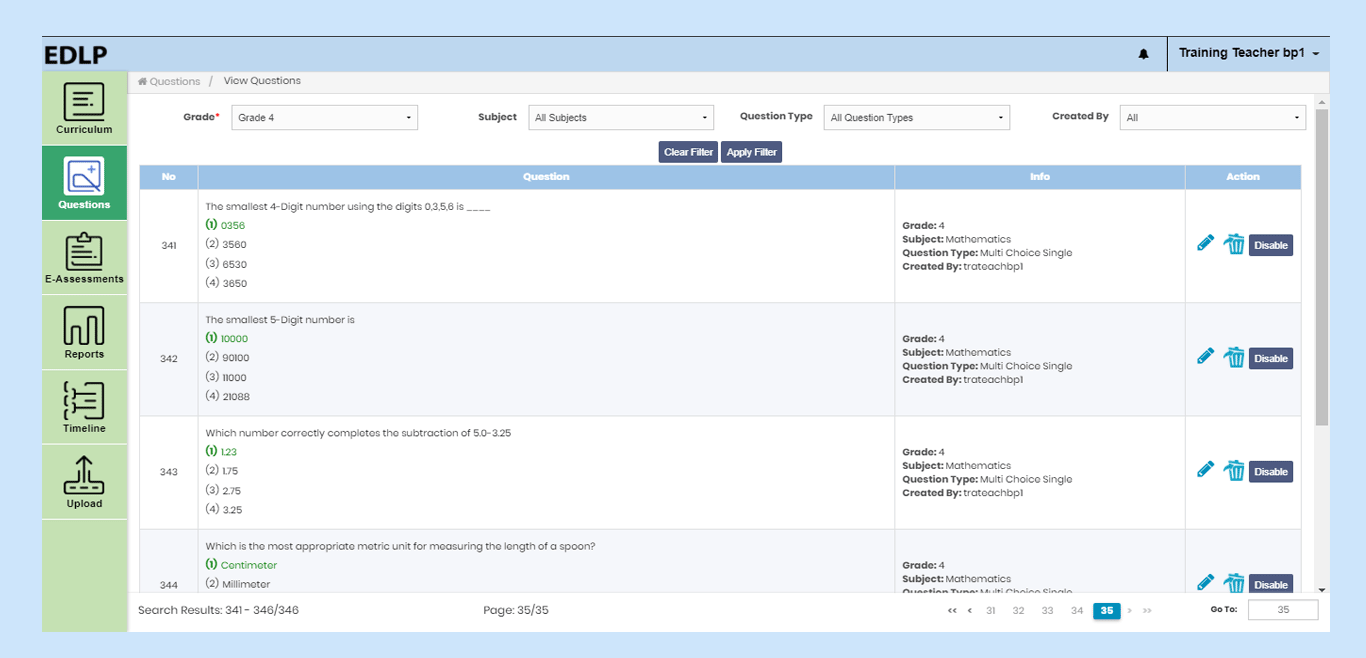 Pic 07: View questions
After selecting the filter, you must click on “Apply Filter” to see the respective filtered questions.
After the filter is applied, the questions will be displayed along with other recorded parameters like grade, subject, type of question and creator name with actionable options like edit, delete and disable/enable.
❖ Edit: Edit button allows you to edit the created question and you will be navigated to a screen that will enable you to edit the question.
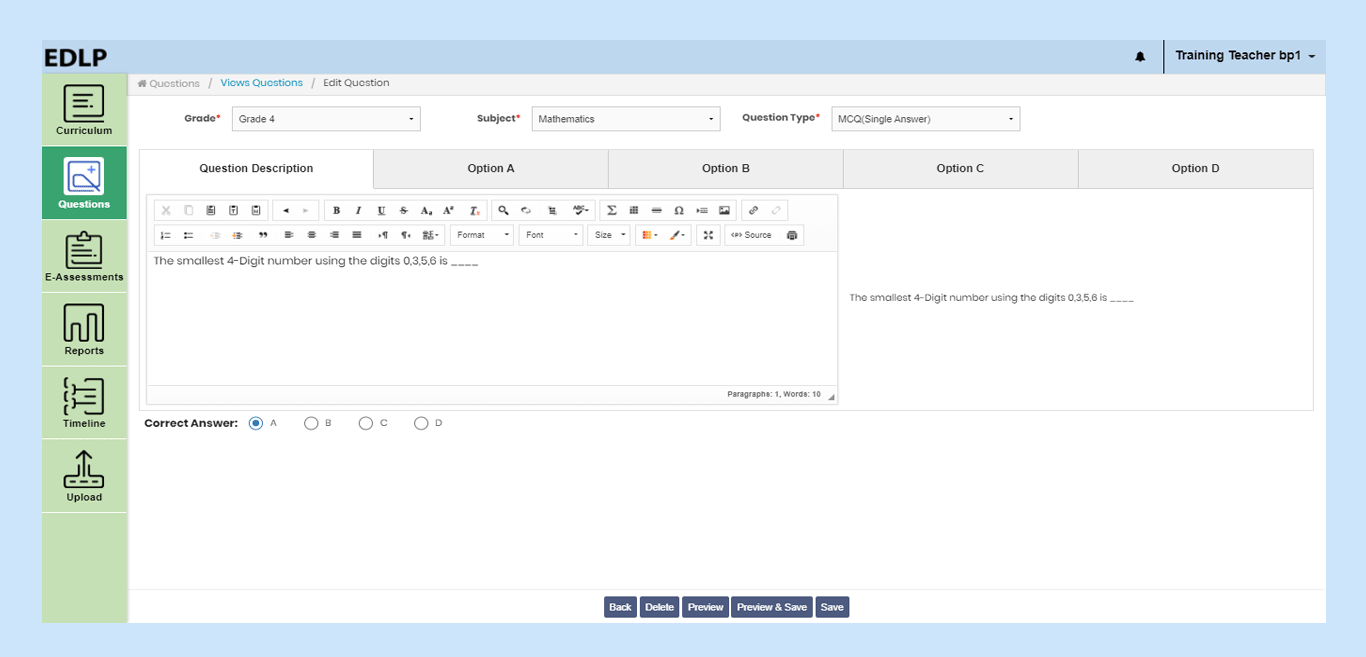 Pic 08: Edit questions
❖ Delete: Clicking on this icon deletes the created question.
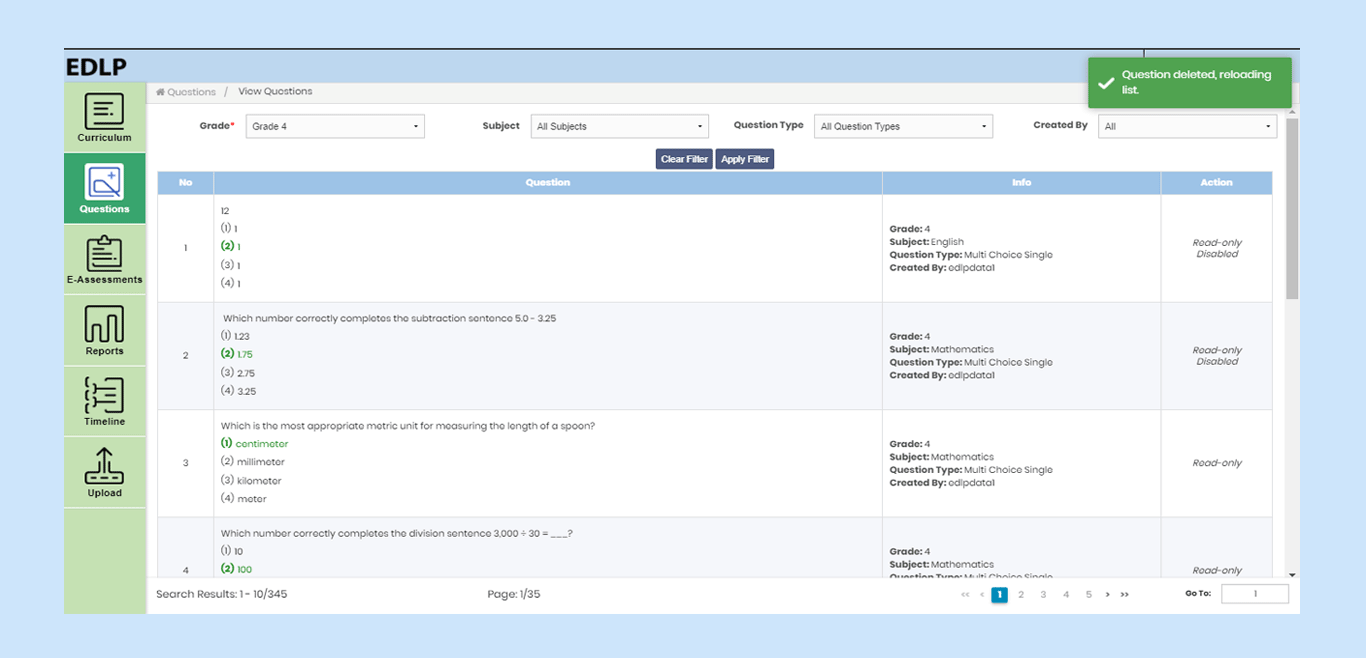 Pic 09: Delete a Question
❖ Enable/disable: If you disable a question by clicking on the “disable icon”, that question will be disabled, and it will not be visible in the questions database while creating an e-assessment.