Modified: October 19, 2021
WPF User Manual:
Pre-requirements
01. Laptop supplied & commissioned in Phase-3, which comes with a pre-installed WPF application.
02. Stable Internet Connection for certain functions.
WPF Application
- For usage of CMS application in Offline mode
- Current settings in WPF applications are meant for training sessions. And certain settings are to be changed after Go-Live of the CMS application
- WPF application should be synced & updated to enable certain features & functionalities to work in Offline mode
Preliminary Verification before usage of the WPF application:
Pic 01: Date & Time to be in Mauritius Time Zone (GMT+4:00). If not, the Laptop must be set up in Mauritius Time Zone.
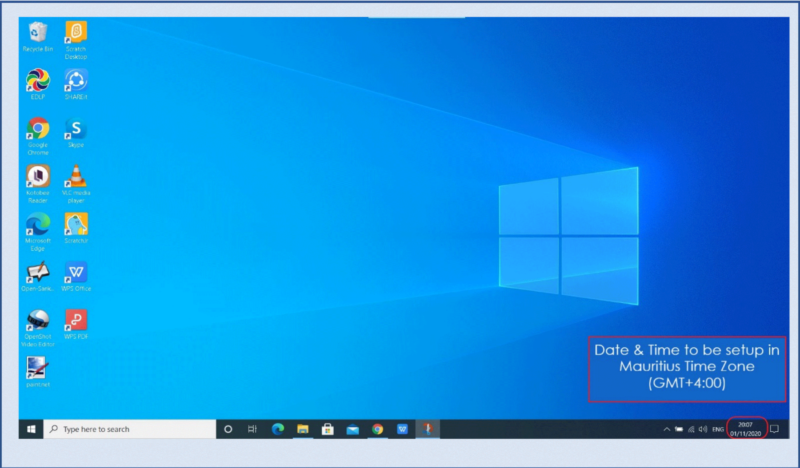 Pic 01: Date & Time of Laptop
 | NOTE: All the Laptops that are commissioned have been set to GMT+4:00 as default time. |
For setting of the Time Zone into Mauritius Time Zone, the following steps to be followed. Refer to Pic 02 & Pic 03.
Pic 02: Type “Change the date and time” in the search bar of the Laptop. And select the “Change the date and time” as it appears in the search list.
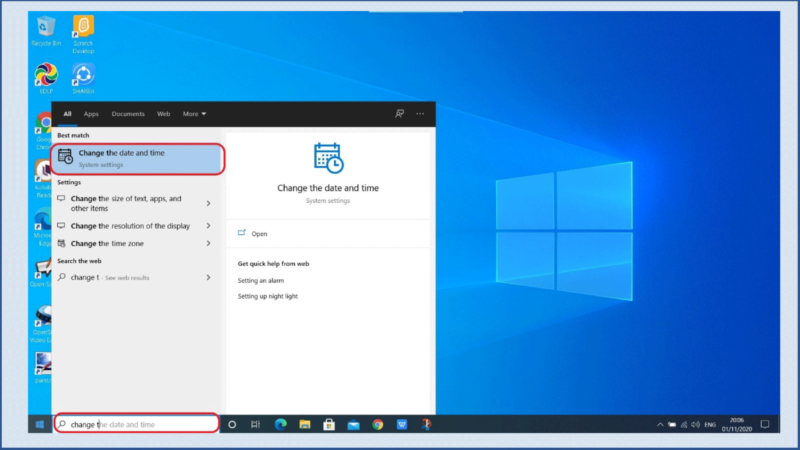 Pic 02: Change Date and time
Connect to the Internet and Follow all the steps given below
Step 01: Set time automatically to ON
Step 02: Set time zone automatically to ON
Now, you will find your time automatically set to Mauritius Time Zone.
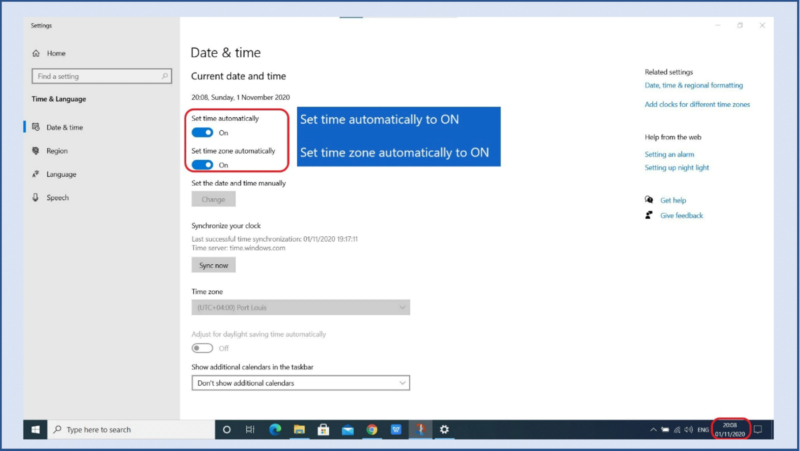 Pic 03: Set time automatically to ON
Pic 04: Click on the EDLP logo to start the application. After opening the application, it looks like this as shown in the image. This application can be moved to any corner on the Desktop by dragging it.
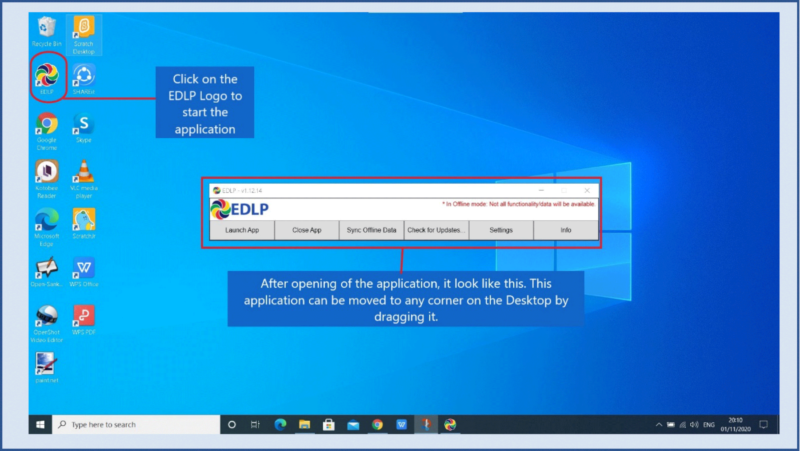 Pic 04: Start EDLP application
Pic 05: WPF application current Latest version is “Erudex App v1.12.14”. It can be verified on the left corner of the application.
If the application version is different, click on the “Check for updates…” to update the application to the current latest version of “Erudex App v1.12.14”
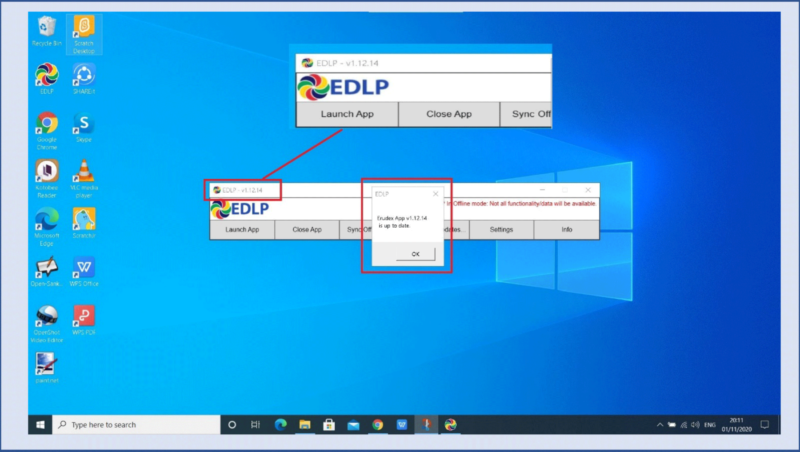 Pic 05: EDLP Version
Pic 06: To verify that the Content Path is set to “F:\Erudex” by clicking on the Settings. If not, it must be set to the above said path.
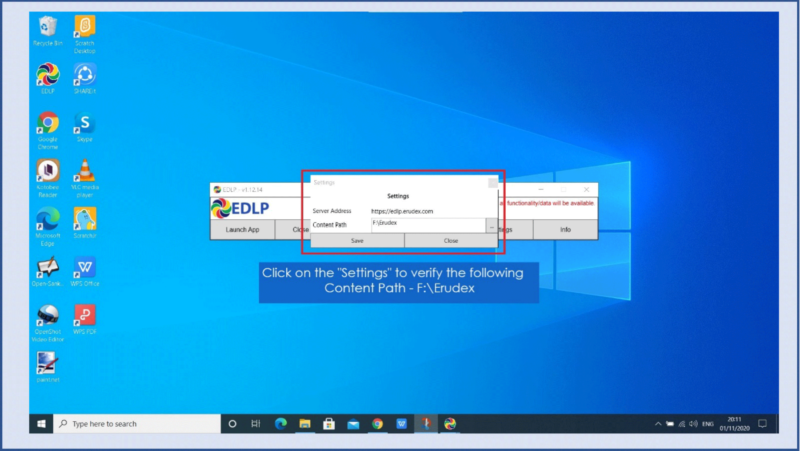 Pic 06: Verifying the Path
Pic 07:
- It is mandatory for the first time to click on the “Info”.
- After clicking on the “Info”, the dialogue box appears as shown in the picture.
- Click on the “Pull Teacher Data” for the first time before login into the application.
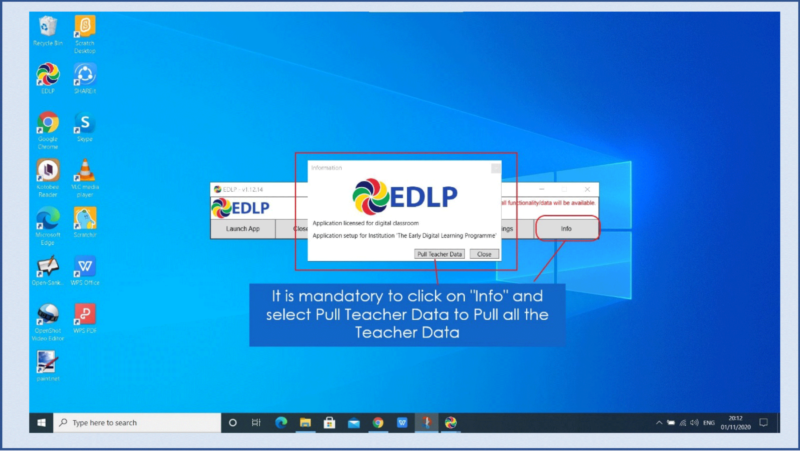 Pic 07: Pull Teacher Data
Pic 08: During the pulling of the data, the screen looks like this. It takes approximately 15-20 minutes for pulling of the data.
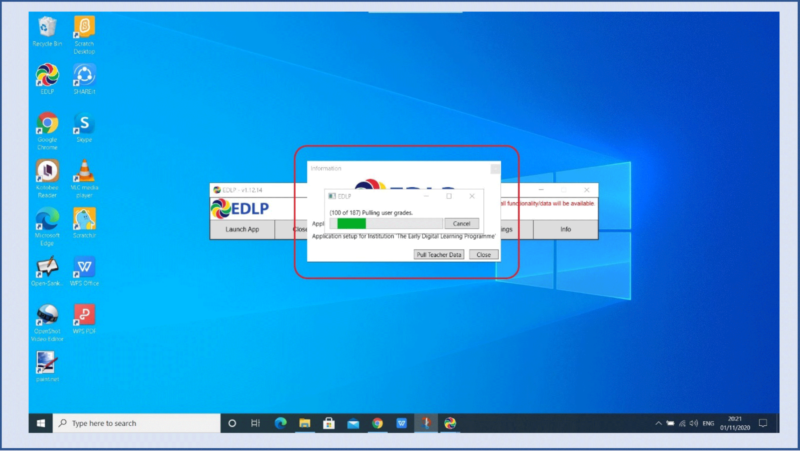 Pic 08: Pulling of the data
Pic 09: After successful pulling of the date, it displays the Dialogue with message “Pulled 187 users”. Then click on OK.
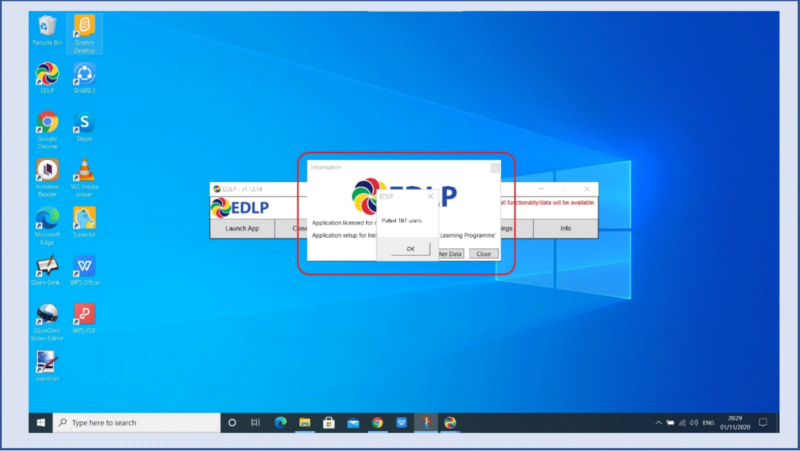 Pic 09
Pic 10: Click on the Launch App.
- Application auto-directs to the chrome browser by default and opens the Login screen to enter the Login Credentials.
 | NOTE: All the Laptops that are commissioned have been pre-installed with Chrome browser. |
1. This WPF application is meant for the Teacher Login only. Hence, only Teacher Credentials are to be used to Login into the application.
2. Click on the minimize button of the application menu, to minimize it to the Taskbar.
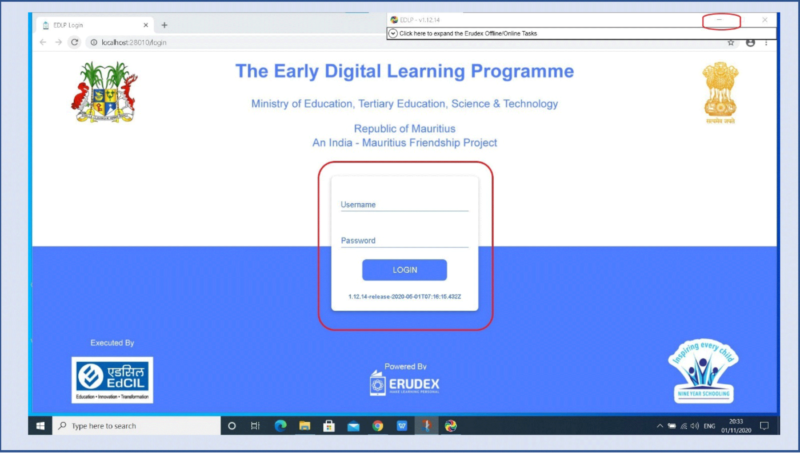 Pic 10: Launch the app
Pic 11: Click on the “Sync Offline Data” to sync the data.
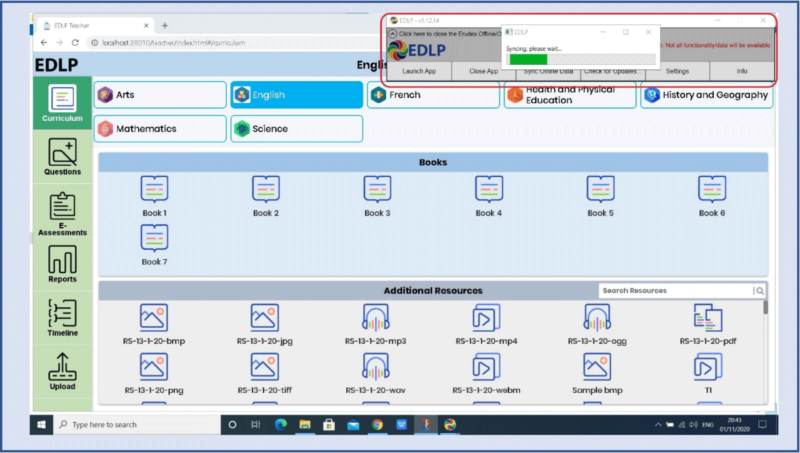 Pic 11: Sync Offline Data
Pic 12: Students mapped to the Teacher will appears like this
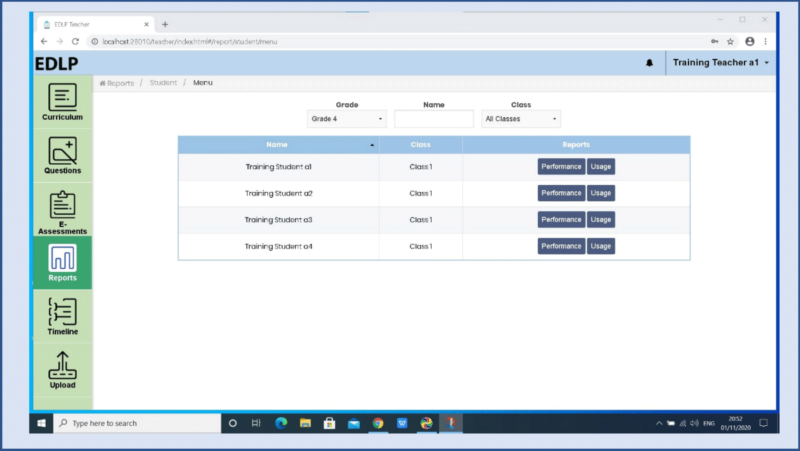 Pic 12: Students mapped to Teacher

