Modified: October 19, 2021
1. Using Wireless Dongle
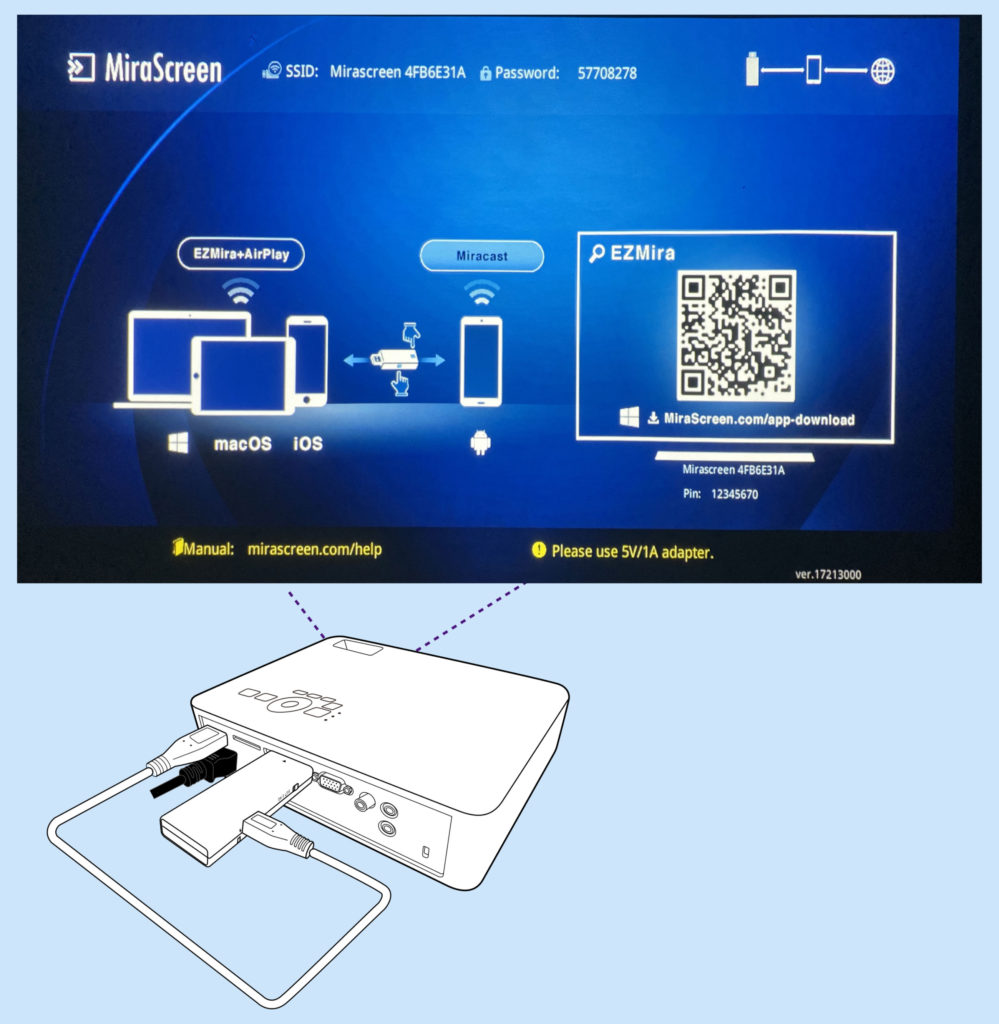
Ensure the Wireless Dongle is pre-connected to the Projector. Once the Projector power is turned ON, the Wireless Dongle will become functional.

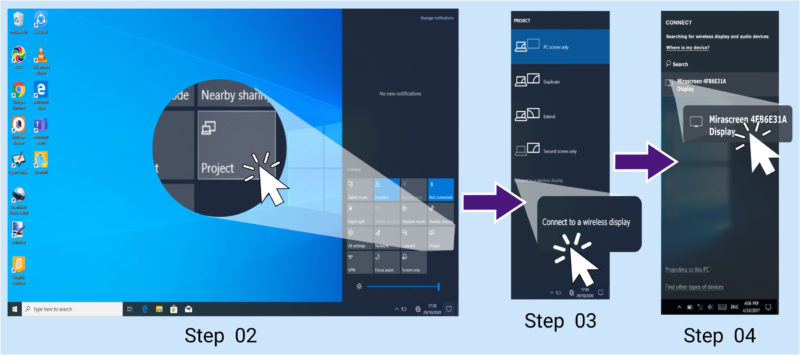
Step 01: Go to Notification Bar in the Laptop
Step 02: Click on “Project”
Step 03: Click “Connect to the wireless display”
Step 04: Wireless Dongle devices within the access are displayed, Click on the Wireless Dongle that matches with the SSID displayed on the projection.
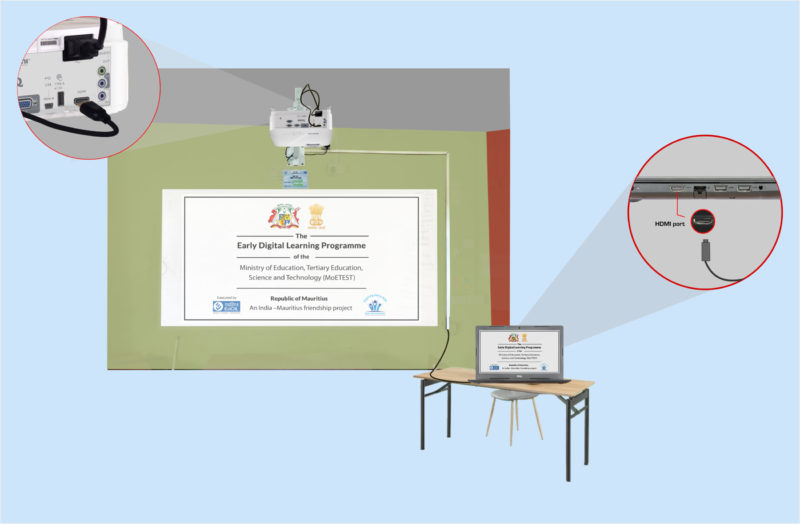
2. Using HDMI Cable
HDMI Cable is fixed to the wall adjacent to the Whiteboard. It is accessible to the teacher for connecting to the Laptop, as an alternative to wireless dongle fixed to the Projector.
To access the HDMI Cable, Please follow the below steps.
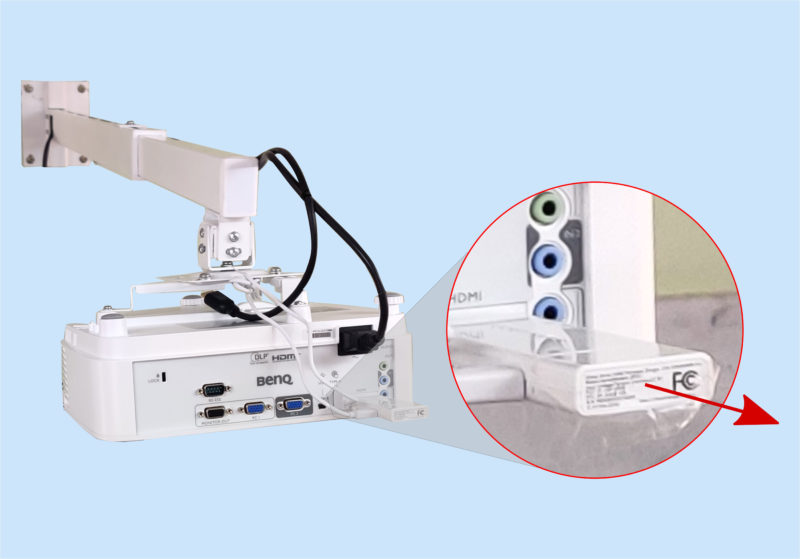
Step 01: Remove Wireless Dongle from the Projector
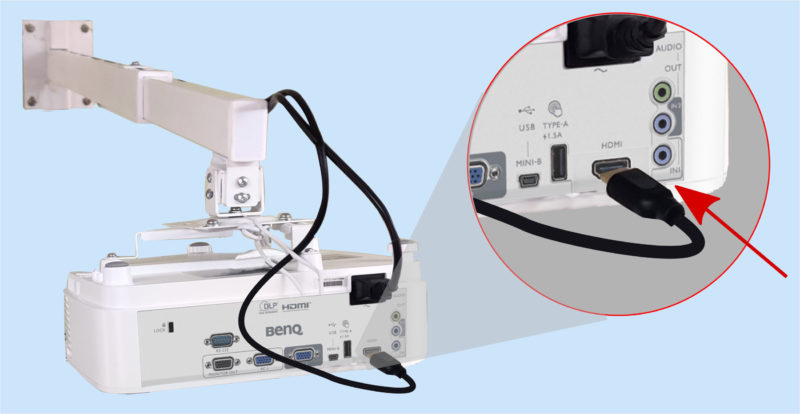
Step 02: Insert HDMI pin in to the Project HDMI Port
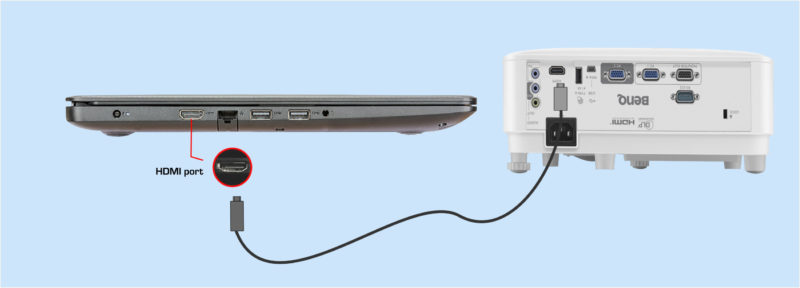
Step 03: Insert Other end HDMI pin in to the Laptop HDMI Port
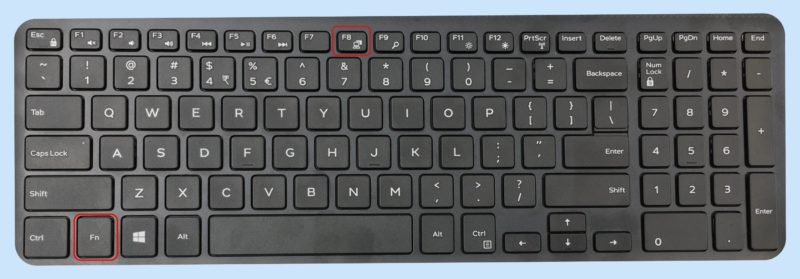
The Projector auto identifies source, if not Click Function (Fn) key +F8 key on the Laptop keyboard to activate projection