


Modified: October 19, 2021
1. Turning On the Projector
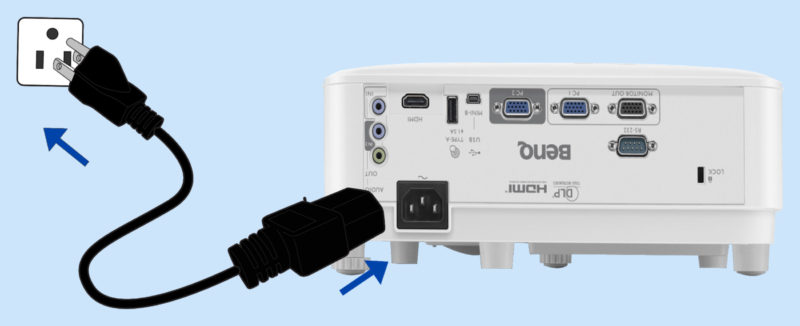
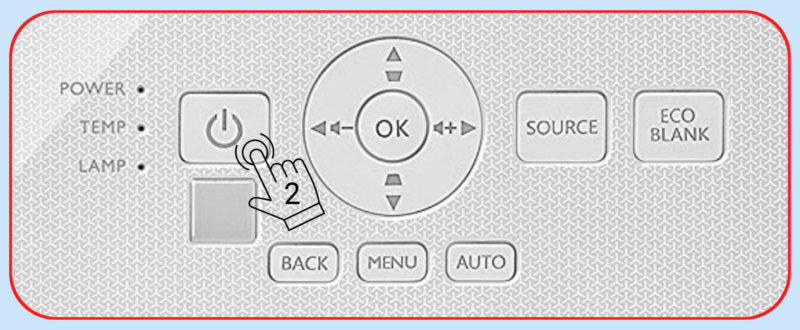
Step 01: Plug the power cord. Turn on the power outlet switch (where fitted). The power indicator on the Projector lights orange after power has been applied.

Step 02: Press POWER on the Projector or on the remote control to start the Projector. The power indicator flashes green and stays green when the Projector is ON. The start up procedure takes about 30 seconds. In the later stage of start up, a startup logo is Projected. (If necessary) Rotate the focus ring to adjust the image clearness.
Step 03: Switch all of the connected equipment ON. The Projector will search for input signals. The current input signal being scanned appears. If the Projector does not detect a valid signal, the message “No Signal” will continue displaying until an input signal is found. You can also press SOURCE to select your desired input signal.

2. Using MENU of the Projector
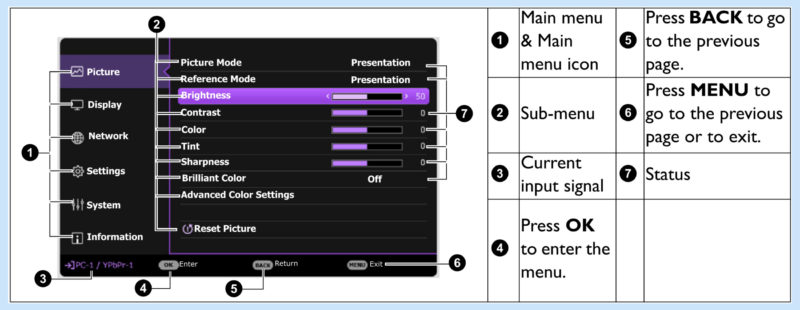
Please note that the on-screen display (OSD) menus vary according to the signal type selected and the Projector model you are using.
The menu items are available when the Projector detects at least one valid signal. If there is no equipment connected to the Projector or no signal detected, limited menu items are accessible.
Using Menu
The Projector is equipped with two (02) types of On-Screen Display (OSD) menus for making various adjustments and settings.
• Basic OSD menu: provides primary menu functions.
• Advanced OSD menu: provides full menu functions
To access the OSD menu, press MENU on the Projector or remote control.
• Use the arrow keys (▶,◂,▴,▾) on the Projector or remote control to move through the menu items.
• Use OK on the Projector or remote control to confirm the selected menu item.
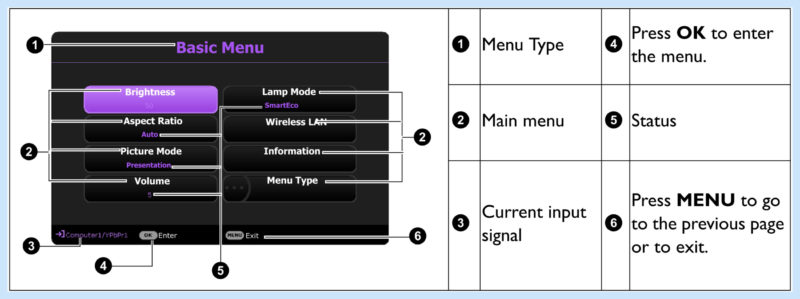
The first time you use the Projector (after finishing the initial setup), Basic OSD menu displays. Below is the overview of the Basic OSD menu.
If you intend to switch from the Basic OSD menu to the Advanced OSD menu, follow the instructions below:
Step 01: Go to Basic Menu > Menu Type.
Step 02: Press OK and press / to select Advanced. Next time when you turn on the Projector, you may access the Advanced OSD menu by pressing MENU.
Below is the overview of the Advanced OSD menu.
Likewise, when you wish to switch from the Advanced OSD menu to the Basic OSD menu, follow the instructions below:
Step 01: Go to Advanced Menu – System > Menu Settings and press OK.
Step 02: Select Menu Type and OK.
Step 03: Press / to select Basic. Next time when you turn on the Projector, you may access the Basic OSD menu by pressing MENU.
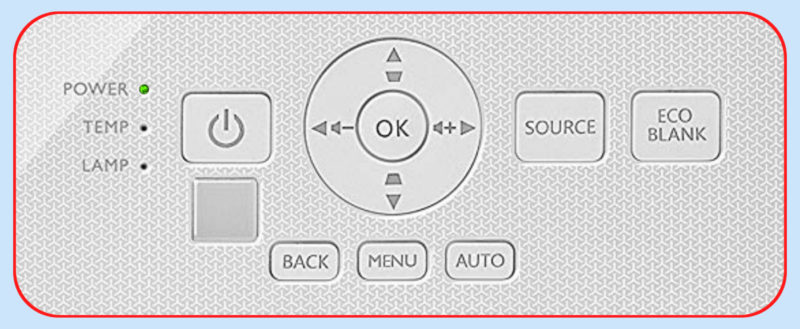
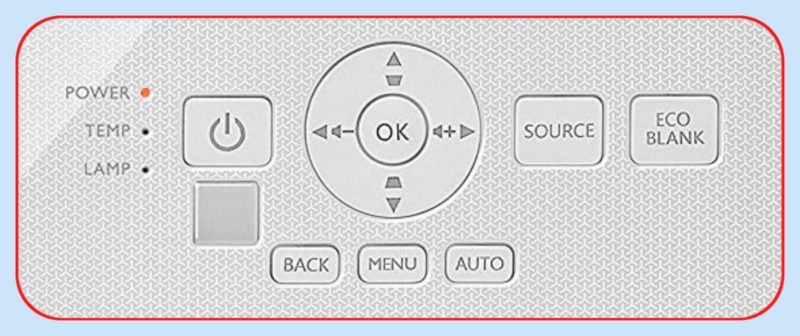
3. LED Indicators
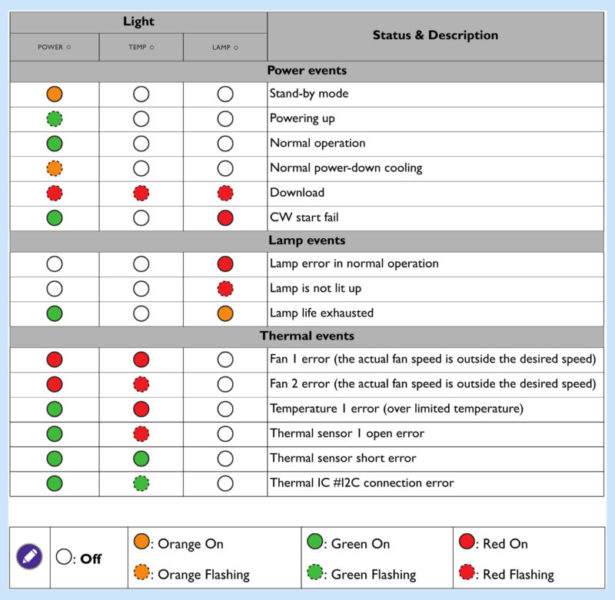
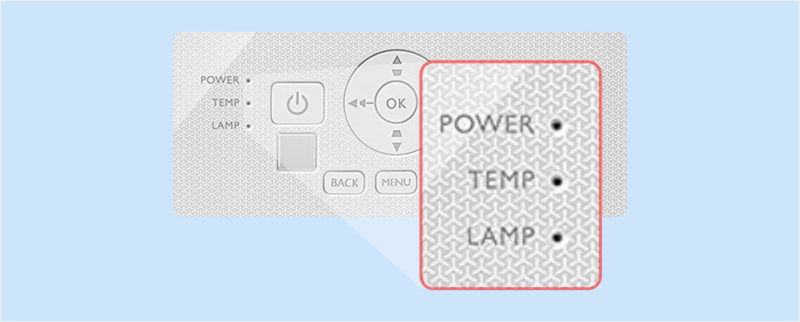
There are three indicators on the Projector Panel – POWER, TEMP and LAMP as shown in the above image. The projector uses these three indicators to alert the user about the events as detailed above.
4. Turning Off the Projector
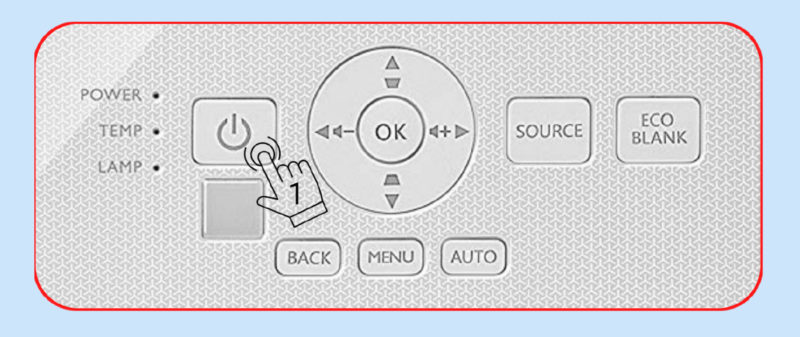
Step 01: Press POWER button on the Projector or on the remote control and a confirmation message will appear prompting you. If you don’t respond in a few seconds, the message will disappear.
Step 02: Press POWER button second time. The power indicator flashes orange, the projection lamp shuts down, and the fans will continue to run for approximately 90 seconds to cool down the Projector.
Step 03: Once the cooling process finishes, the power indicator becomes a steady orange and fans stop. Disconnect the power cord from the power outlet.
• To protect the lamp, the Projector will not respond to any commands during the cooling process.
• Avoid turning on the Projector immediately after turning it off as excessive heat may shorten lamp life.
• Lamp life results will vary depending on environmental conditions and usage.
Direct Power Off
The AC power cord can be pulled out right after the Projector is turned off. To protect the lamp, wait about 10 minutes before restarting the Projector. If you attempt to re-start the Projector, the fans may run for a few minutes to cool down. In such cases, press the POWER button again to start the Projector after the fans stop and the power indicator turns orange.
Setting Auto Power Off
This function allows the Projector to turn off automatically if no input signal is detected after a set period of time to prevent unnecessary waste of lamp life. To set Auto Power Off, go to Advanced Menu – Settings > Power On/Off Settings > Auto Power Off and press ◀/▶.