


Modified: October 19, 2021
1. SD Card Insertion
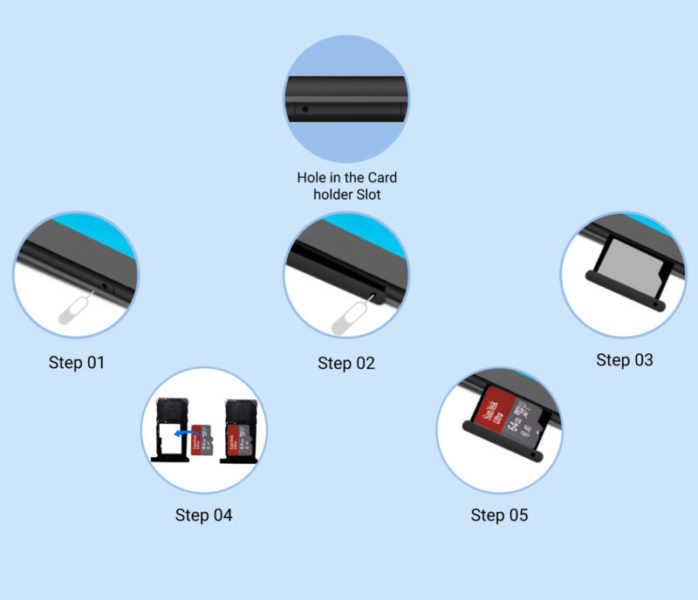
Step 01: Insert Ejector Tool in the card holder slot hole and give a gentle push
Step 02: Card holder comes out
Step 03: Carefully pull the card holder completely out form from the slot
Step 04: Place the SD card in the holder
Step 05: Insert the card holder back into the slot and lock it in place
Note: Reverse the steps to Eject the SD Card


2. The Tablet Storage / Portable Storage
Step 01: Once the SD card is inserted in SD card slot – the Notification window will pop up with the Set-up and Eject options – Select SET-UP

Step 02: The click on setup will pop up a window with the two (02) options. Click on the appropriate option
Option 01: Using SD card as the Tablet storage. SD card is formatted and is used as the Tablet storage

Option 02: Using SD card as the Portable storage. SD card is ready to be used as Portable storage


3. Data Transfer – Method 1: Using USB cable
![]()
Step 01: Connect the Tablet (Micro USB port) to the Laptop (USB port)
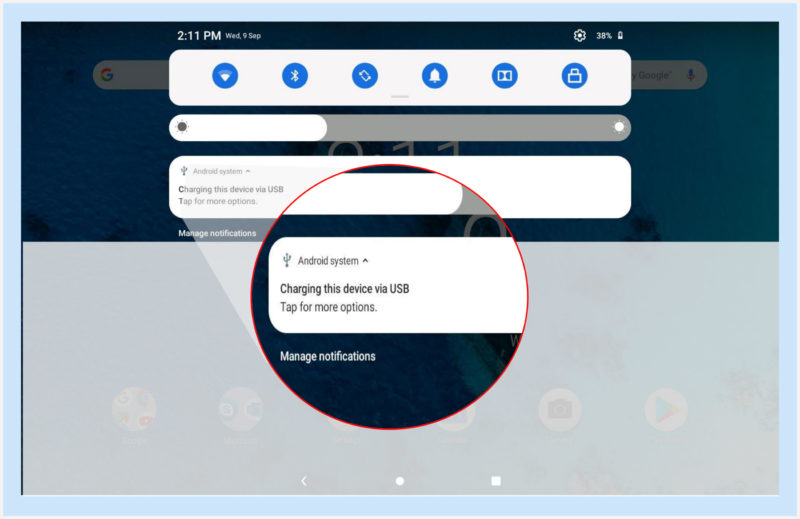
Step 02: If the Tablet is successfully connected to the Laptop it gives a beep sound. Notification window will pop-up with a message ‘Charging this device via USB’. Click on ‘Tap for more options’
![]()
In the USB computer connection window – Charge only option is applied by default.
![]()
Step 03: Select Media device (MTP) option to activate data transfer
![]()
Once MTP option is selected, the Notification window updates the status as USB file transfer turned on – Now, access the Tablet internal and SD card data storage from the Laptop using File Explorer.
4. Data Transfer – Method 02: Using SD Card
![]()
Step 01a-01d: Use SD card Ejector Tool and eject SD card from the Tablet
![]()
Step 02: Insert SD card in to the SD card slot and lock in place
![]()